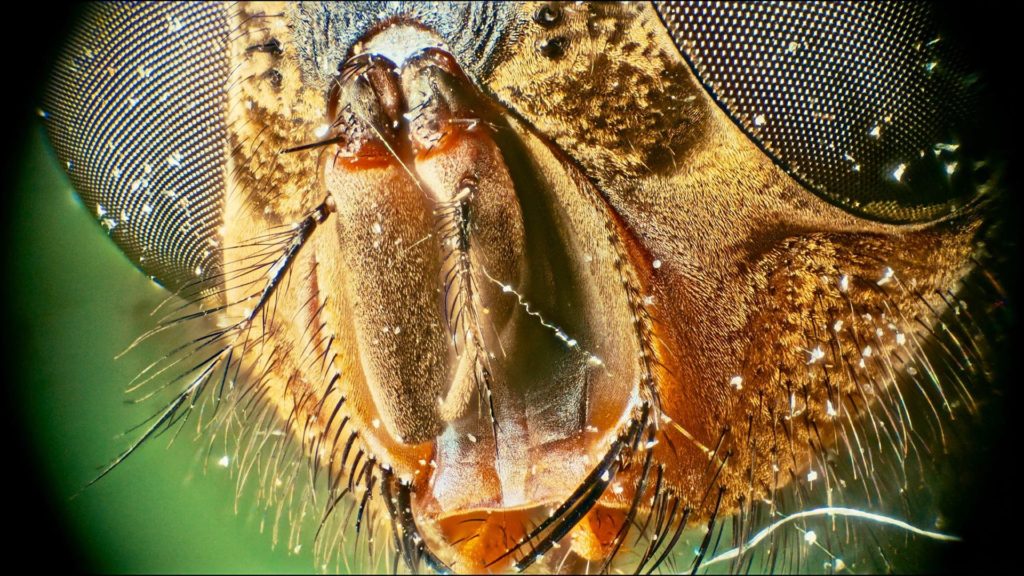
Here’re some insane shots by filmmaker Daniel Schweinert, which paired the Blackmagic Pocket 6K Cinema Camera with microscope lenses. Welcome to the world of micro filmmaking. Read how he did it.
Micro filmmaking
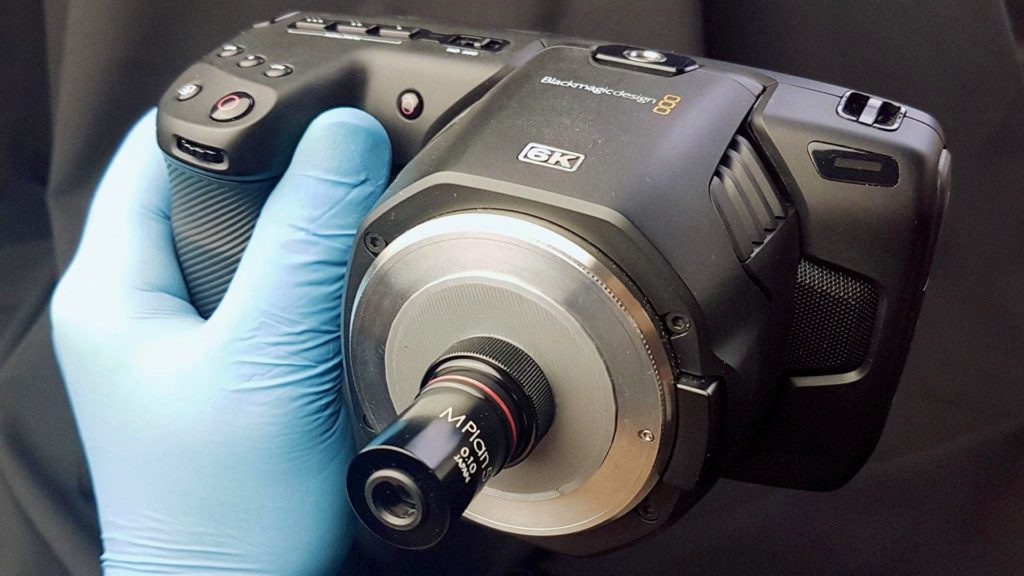
Macro filmmaking is not new. The Laowa 24mm f/14 2X Macro Probe has helped to bring beautiful and extreme macro filmmaking to the masses. This “Bug Eye” Perspective is being implemented on many commercials and even high-budget productions. However, micro filmmaking is less familiar, compared to microphotography. Basically, micro-shots are achieved by utilizing microscope lenses on a camera (DSLR, mirrorless, or cinema). Of course, it demands the use of multiple adapters, depends on the magnifying level of the microscopic lens. Fortunately, filmmaker Daniel Schweinert which describes himself as a “Tech Nerd”, has improvised this powerful filmmaking machine (Blackmagic Pocket 6K) to be paired with microscope lenses. The results are insane. Read below how he did it.
I had some fun lately shooting some macro, and I was curious if I could somehow use my father’s old microscope lenses on my photo and video cameras.
Filmmaker Daniel Schweinert
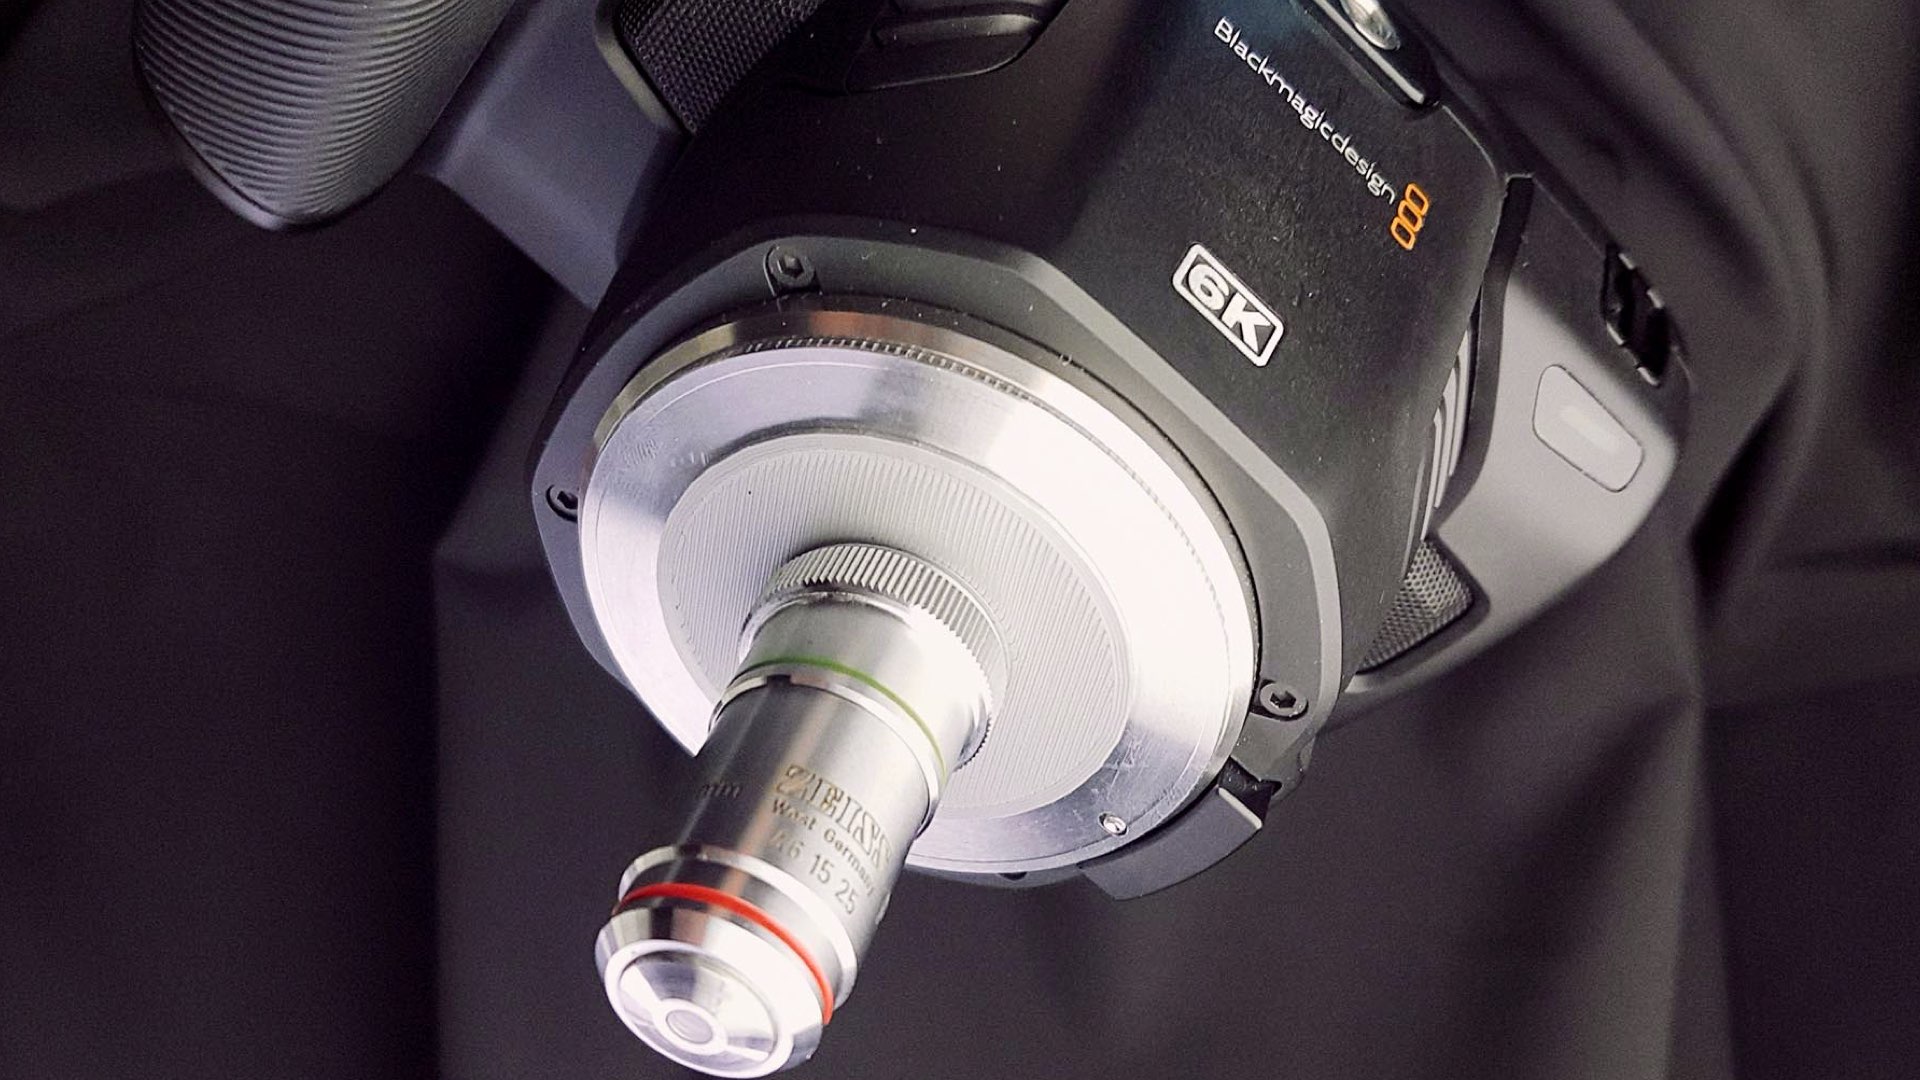
Microscope lenses on Blackmagic Pocket 6K
“I had some fun lately shooting some macro, and I was curious if I could somehow use my father’s old microscope lenses on my photo and video cameras,” Daniel says. For that, he needed a special adapter “M42 to RMS” which was found as an STL model. Daniel 3D printed it from PLA with a layer height of 0.10mm. Then the adapter was screwed into the M42 to CanonEF metal adapter. Furthermore, Daniel needed to use extension tubes in order to prevent vignetting that occurred at 8x magnification. Thus he increased the distance from the camera to microscope lens to about 160mm to get that 8x magnification from the Lomo 8x.
Extension tubes and a lot of light!
“I started with the thin extension tubes from the accessories that came with the microscope and got a good magnification to work with. After that, I added my Kenko/Canon EF extension tubes, and the whole length was about 160mm” Daniel says. “You can play with that length depending on the magnification you need. And don’t forget you need a lot of light! This was just a quick test setup on my desk to see if it works, and it did! I got to a maximum of X8 magnification from the Lomo microscope lens with all the extension tubes that I had. I also tested the 16x and 40x microscope lenses, and the magnification is mind-blowing” he adds.
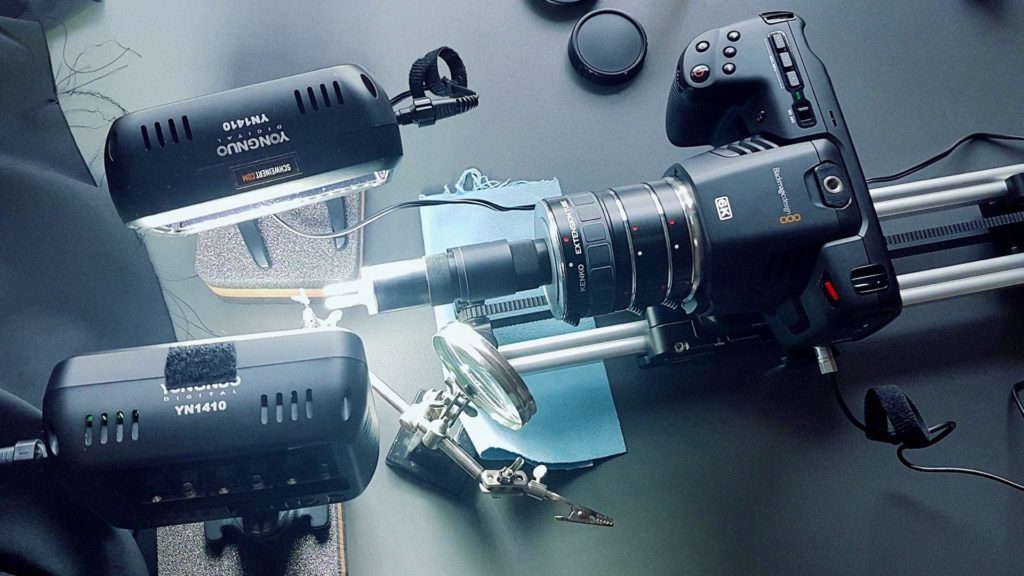
You can play with that length depending on the magnification you need. And don’t forget you need a lot of light!
Filmmaker Daniel Schweinert
Setup
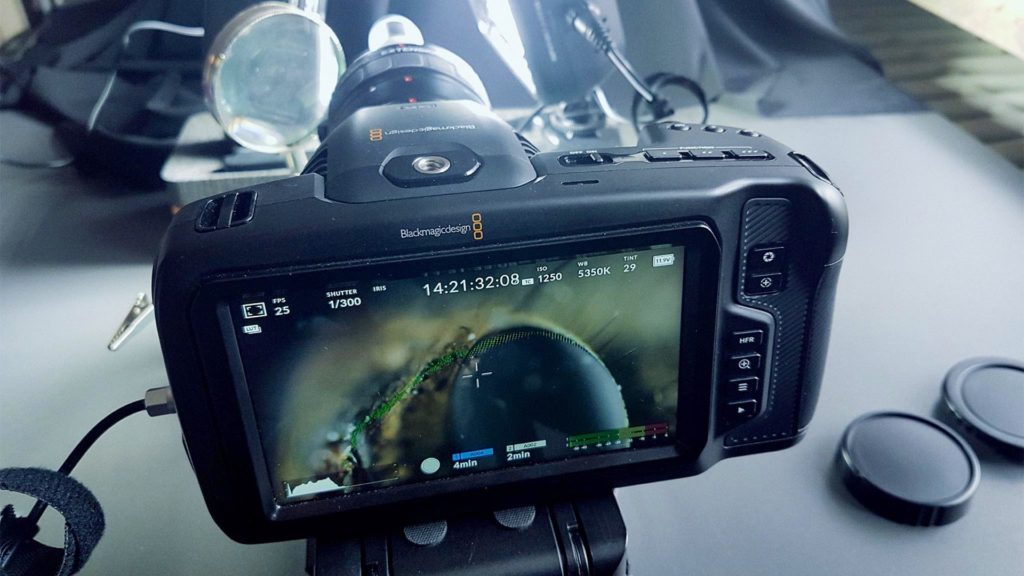
The camera was mounted on an old Edelkrone slider with a motion module. Daniel recorded short 4K ProRes422HQ clips and use them for focus stacking directly in helicon focus. “For this fly, I used an average of 160 frames. The slider was not meant for these extreme macro shots, so I had to increase the shutter speed to 1/300 to avoid the motion blur from the shakiness. This way, I get crystal clear frames that work perfectly in helicon focus” he summarizes.
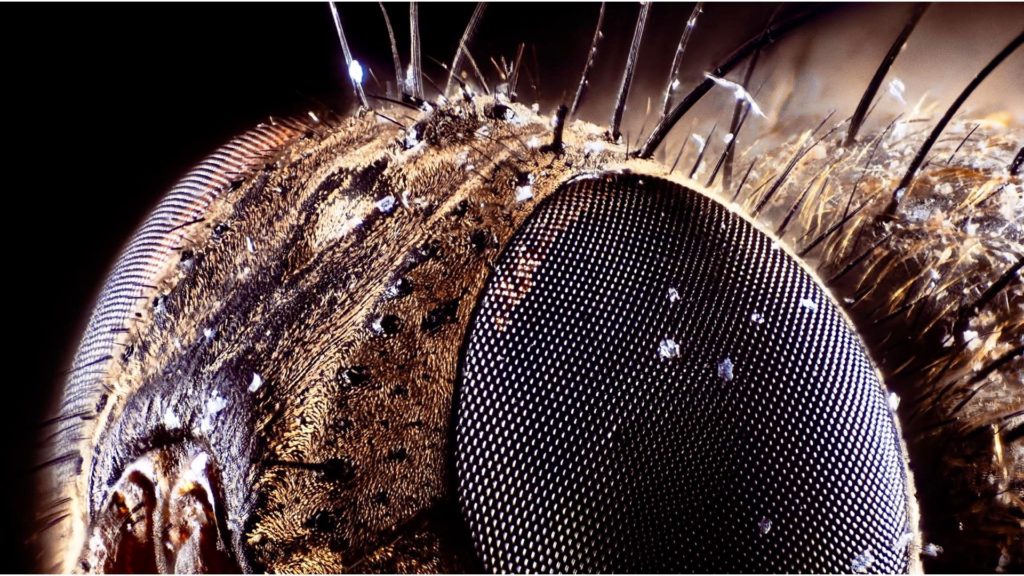
For this fly, I used an average of 160 frames. The slider was not meant for these extreme macro shots, so I had to increase the shutter speed to 1/300 to avoid the motion blur from the shakiness.
Filmmaker Daniel Schweinert
Final thoughts
Although we didn’t see the videos, the pictures speak for themselves. Moreover, this camera and lens setup is very affordable by utilizing very simple components. Nevertheless, the challenge here is the motion. In order to get those shots, a very precise slider is a MUST. Of course, it needs to be paired with a lot of light. Finally, we’d like to thank Daniel for elaborating on this outstanding creation process. Explore his work on his website, Instagram, Vimeo, and Youtube.

