Generating proxies is an integral part of the editing process, especially when dealing with high-resolution RAW media. In this short and efficient tutorial by the great educator Casey Faris, the importance of proxies is demonstrated. Furthermore, the options to generate proxies in DaVinci Resolve 18 is well explained. This is a must-watch tutorial.
Why should you generate proxies?
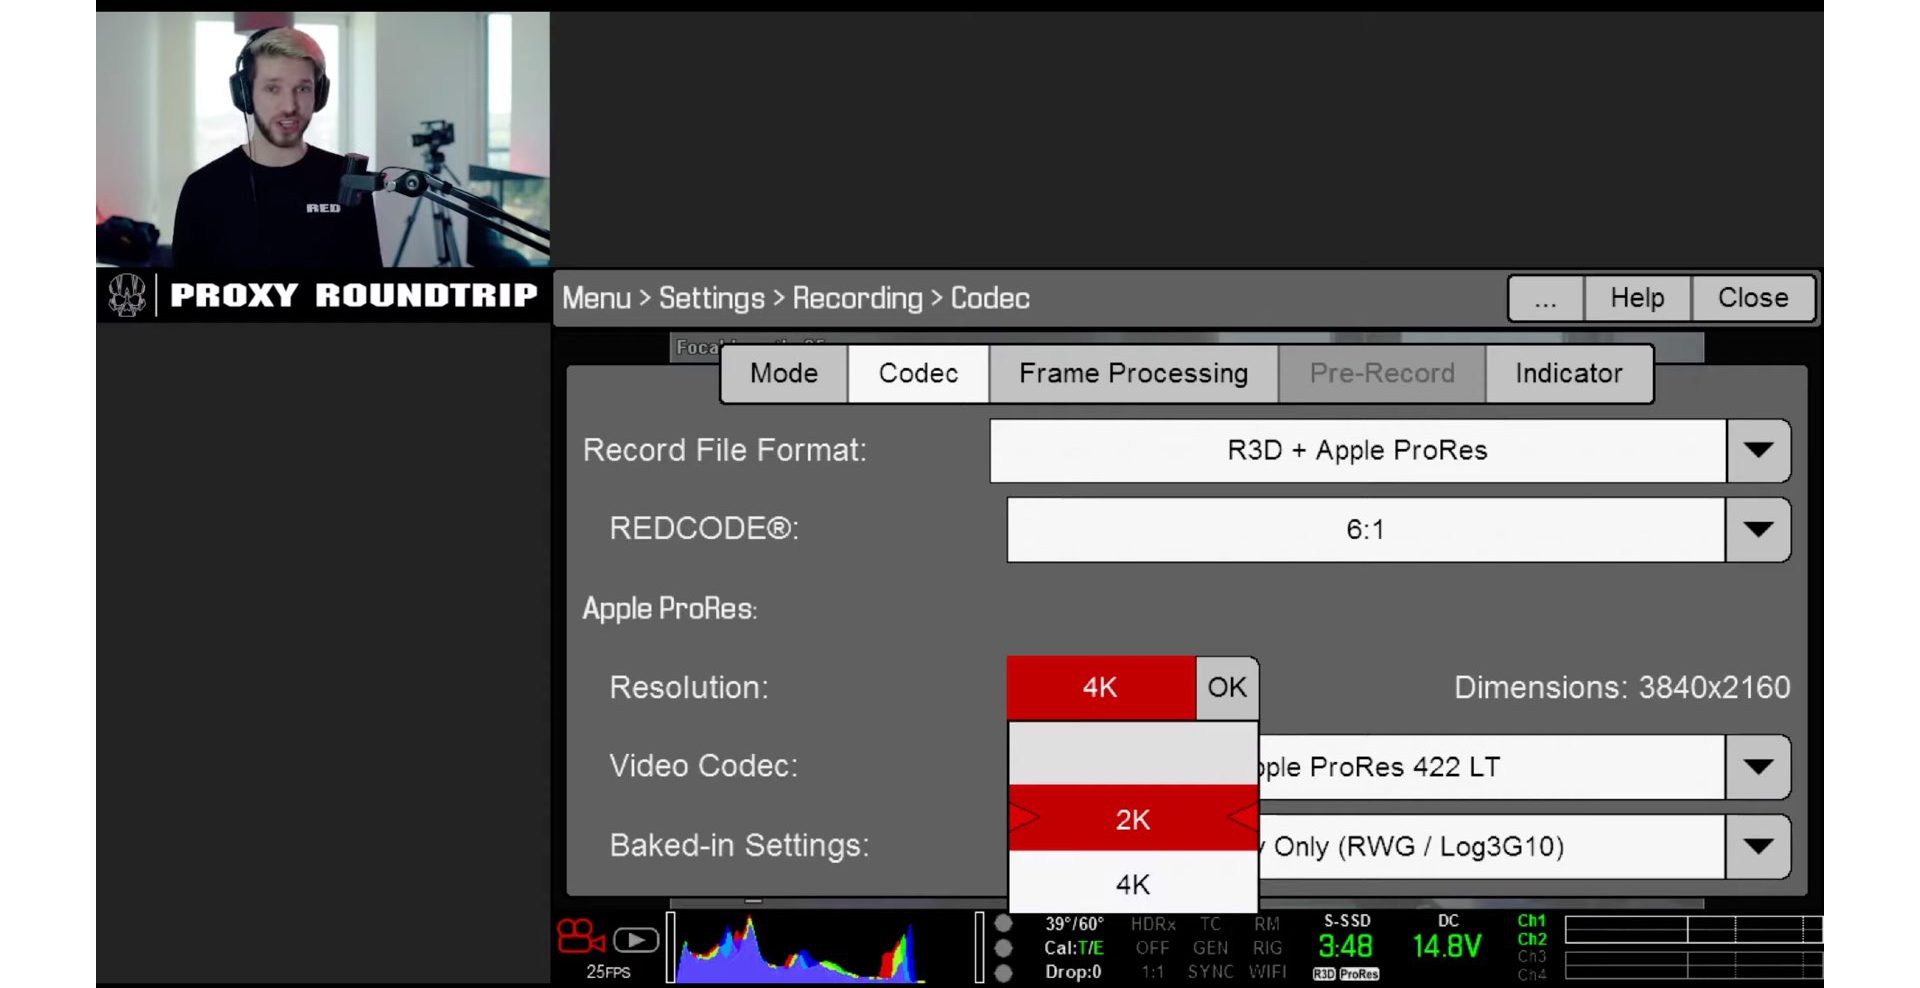
The process of generating proxies is basically taking the hi-res original footage and converting it to a smaller file size, which is half the resolution and is easier to playback. The converted proxies are in addition to the original media. That mean, on every original file, there will be a converted proxy file, which is significantly smaller. Many professional cinema cameras can generate those proxies when shooting, together with the high-res raw file. You should make proxies even if you own a robust fully specced machine, especially when the footage undergoes extensive editing, like multilayer timelines, speed ramping, LUT-ing, and more. In this case, bringing to edit a heavy-duty complicated loaded timeline with 6K raw and above, can result in dropped frames and impaired playback. Thus, proxies can dramatically reduce the load.
Generating proxies in Resolve 18
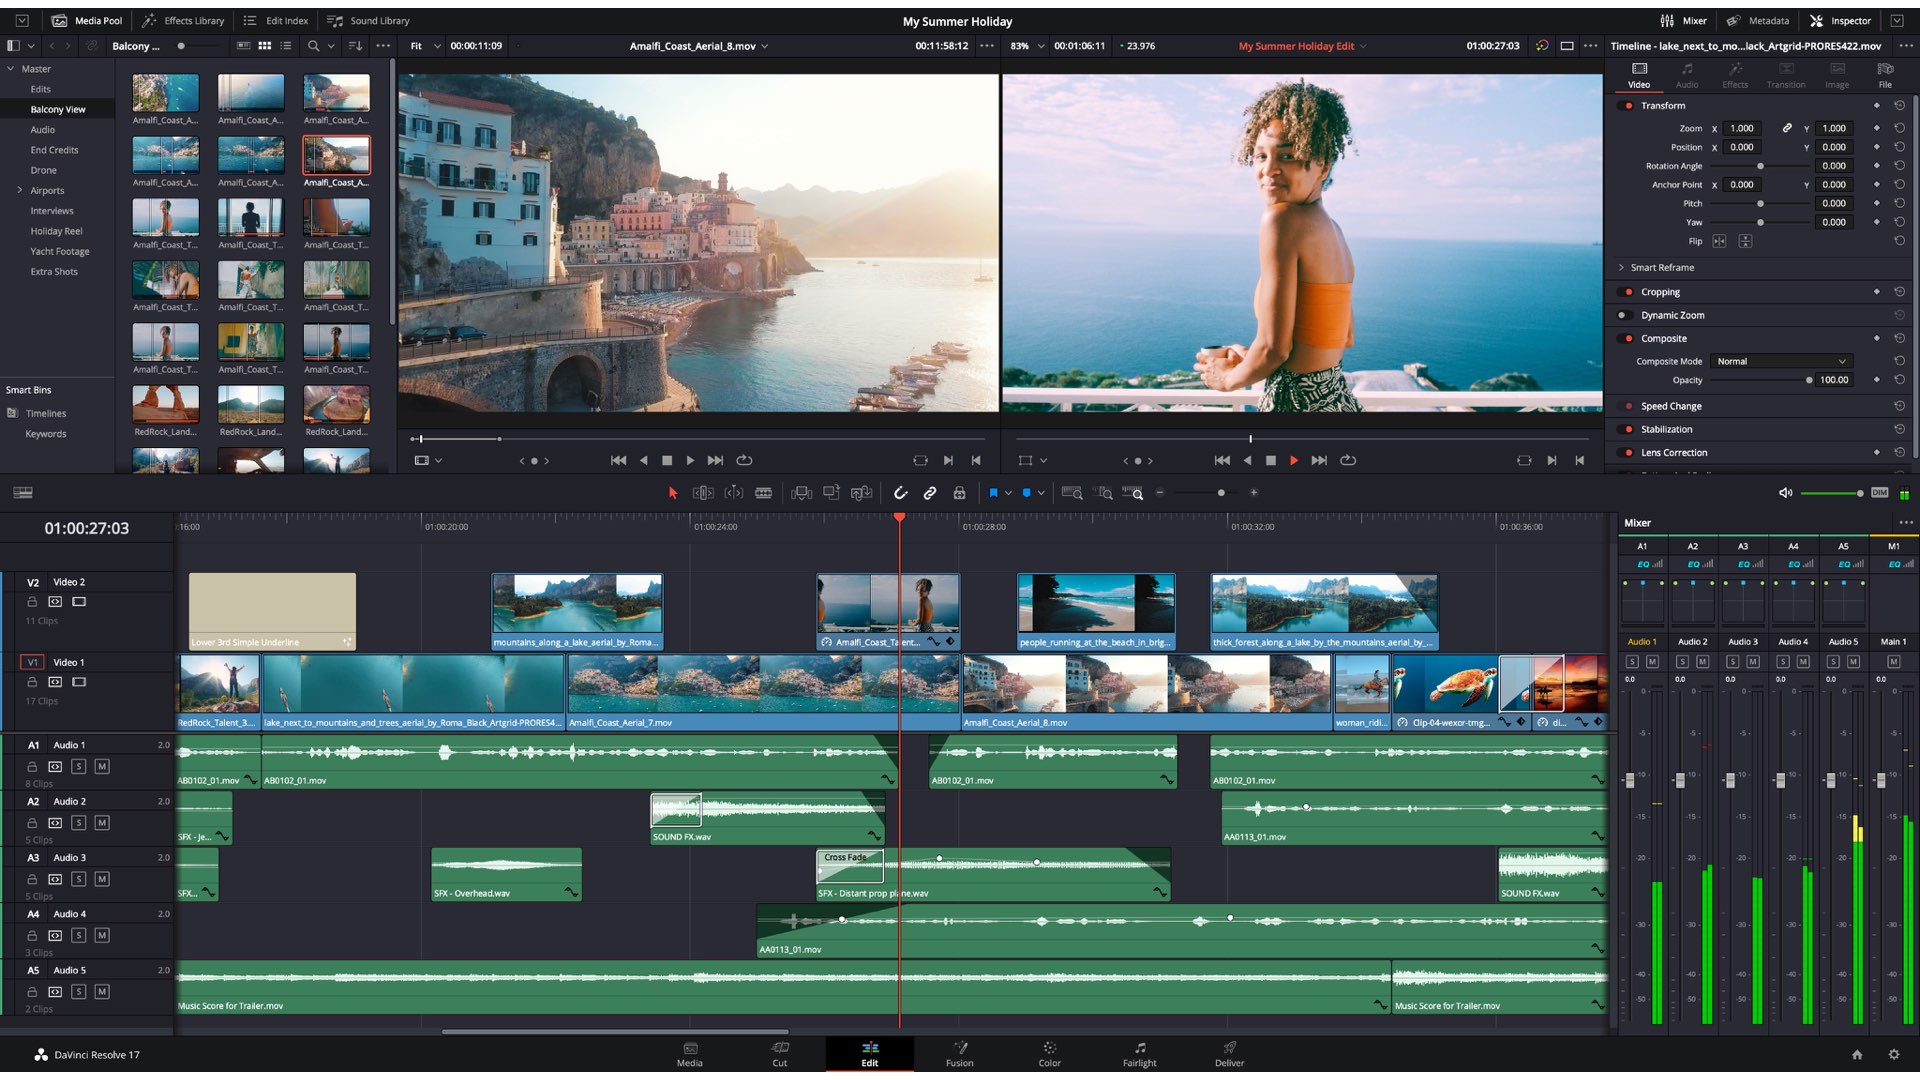
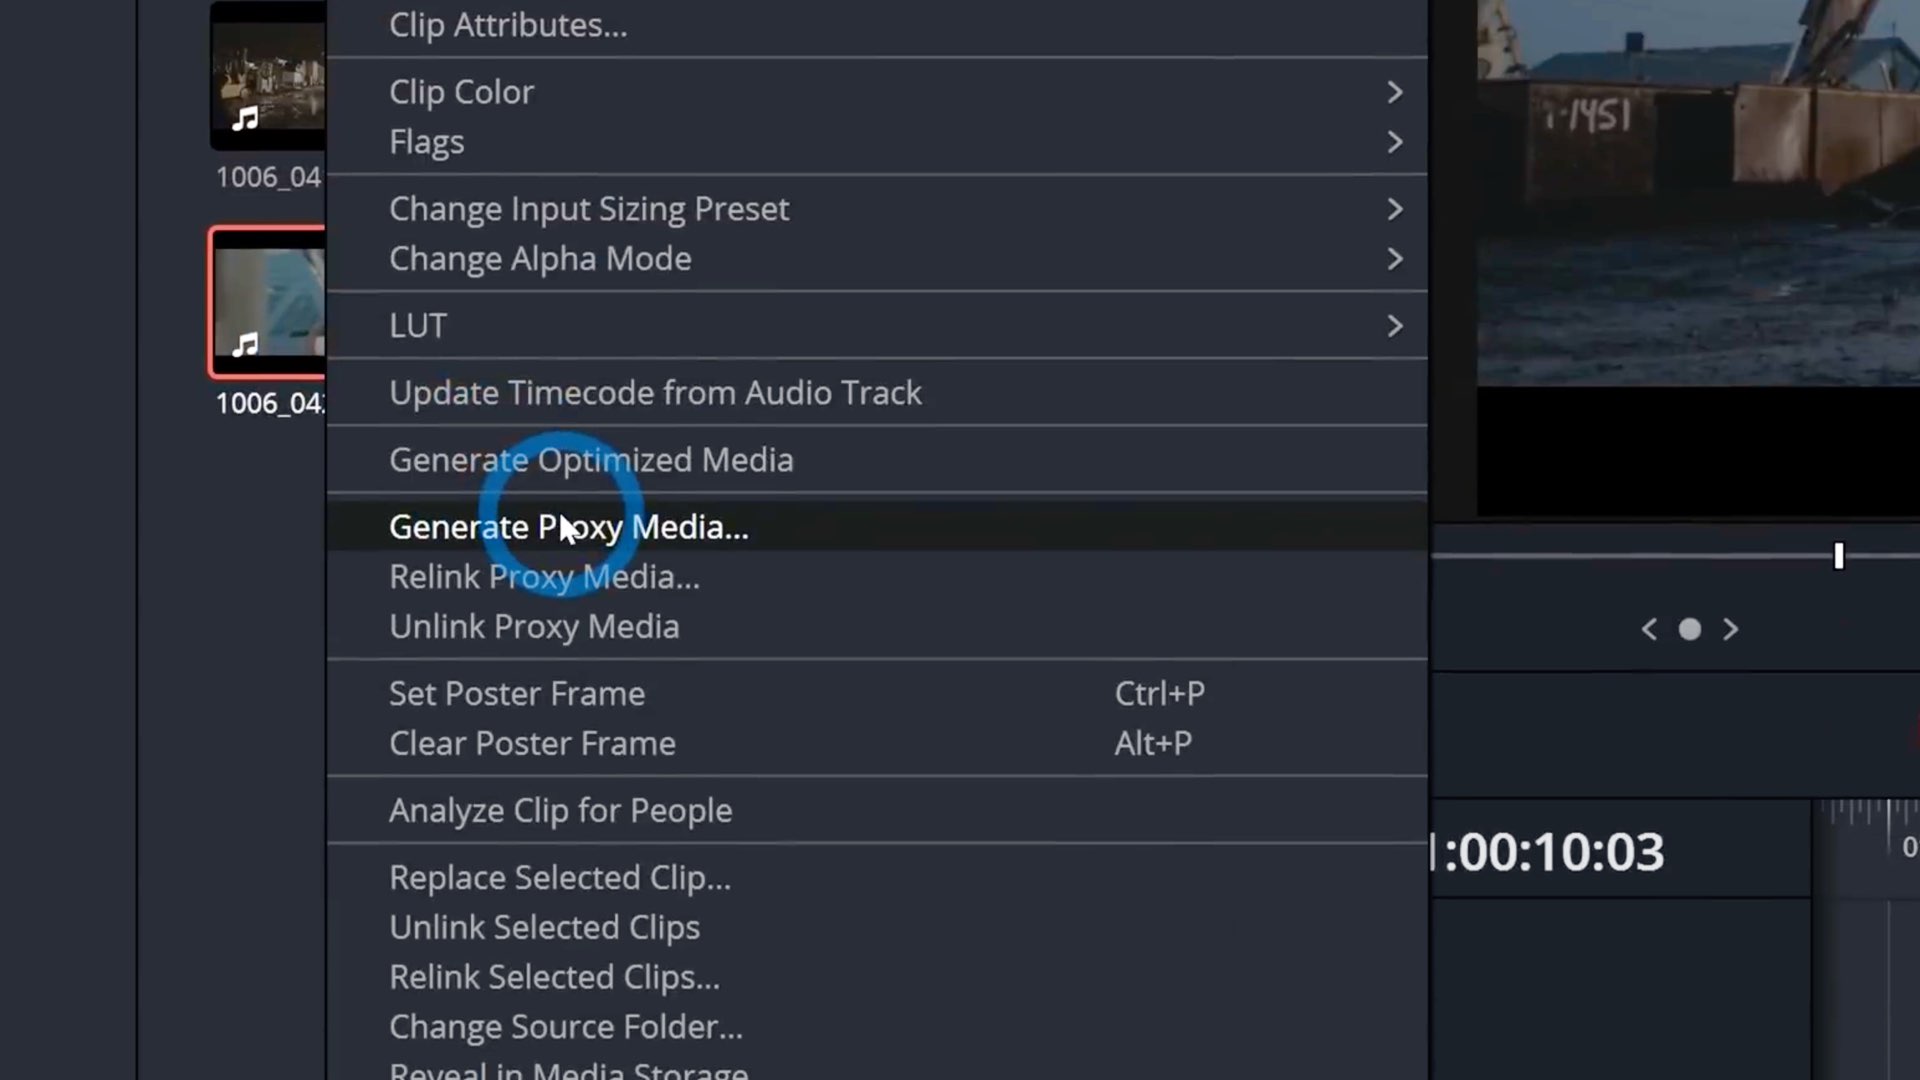
DaVinci Resolve 18 offers a very user-friendly GUI that allows you the privilege of working with proxies with minimal hassle. The easiest way is to right-click on the clip and select ‘Generate Proxy Media’.
You can tell if it’s a proxy file by the small camera icon on the thumbnail. Then the playback is supposed to run much more fluently and with a lot less dropping frames.

Adjusting the setting of the proxies
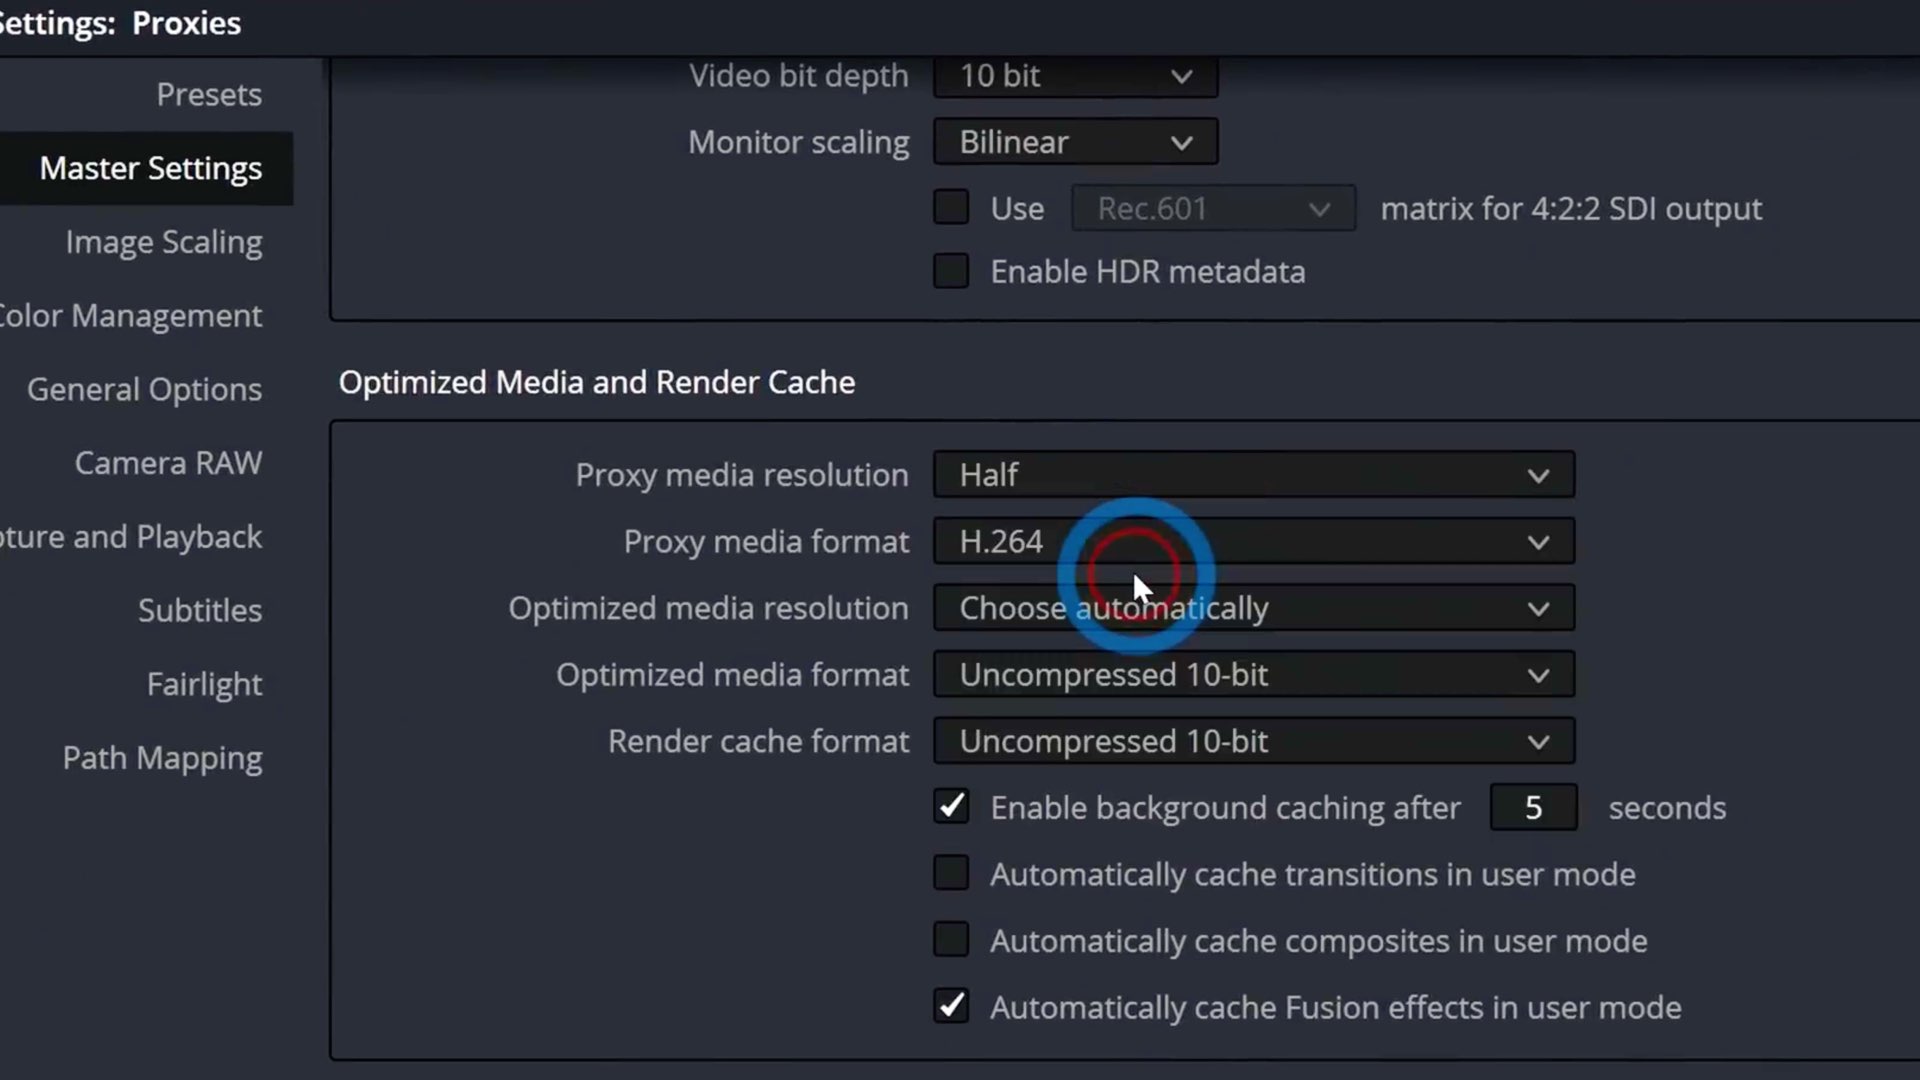
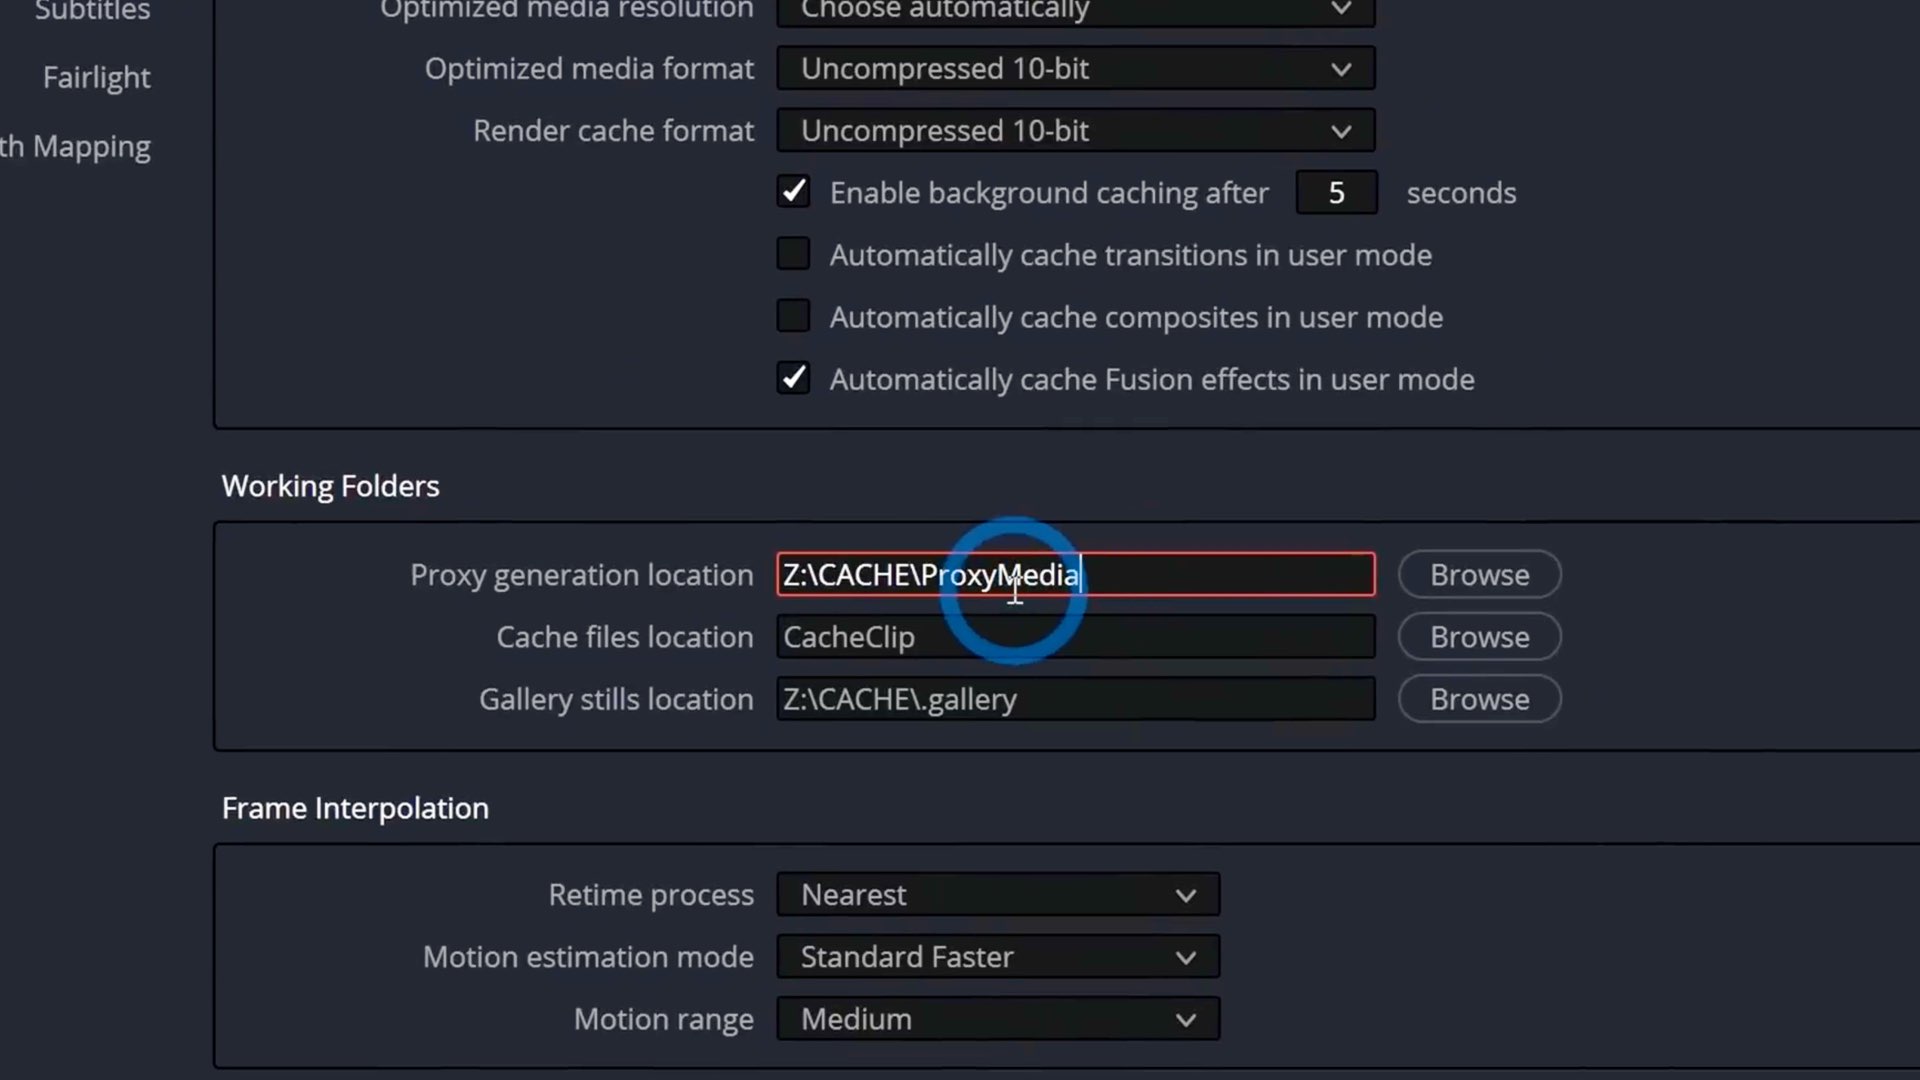
On the setting page, under Master Settings, you can adjust your personal preferences regarding the proxies. Basically, you can adjust the proxy media resolution, and format. For instance, picking a half resolution compared to the original, and an H.264 for the file format. Furthermore, you will want to define the location of those proxy files as well.
‘Improving’ the location of the proxies
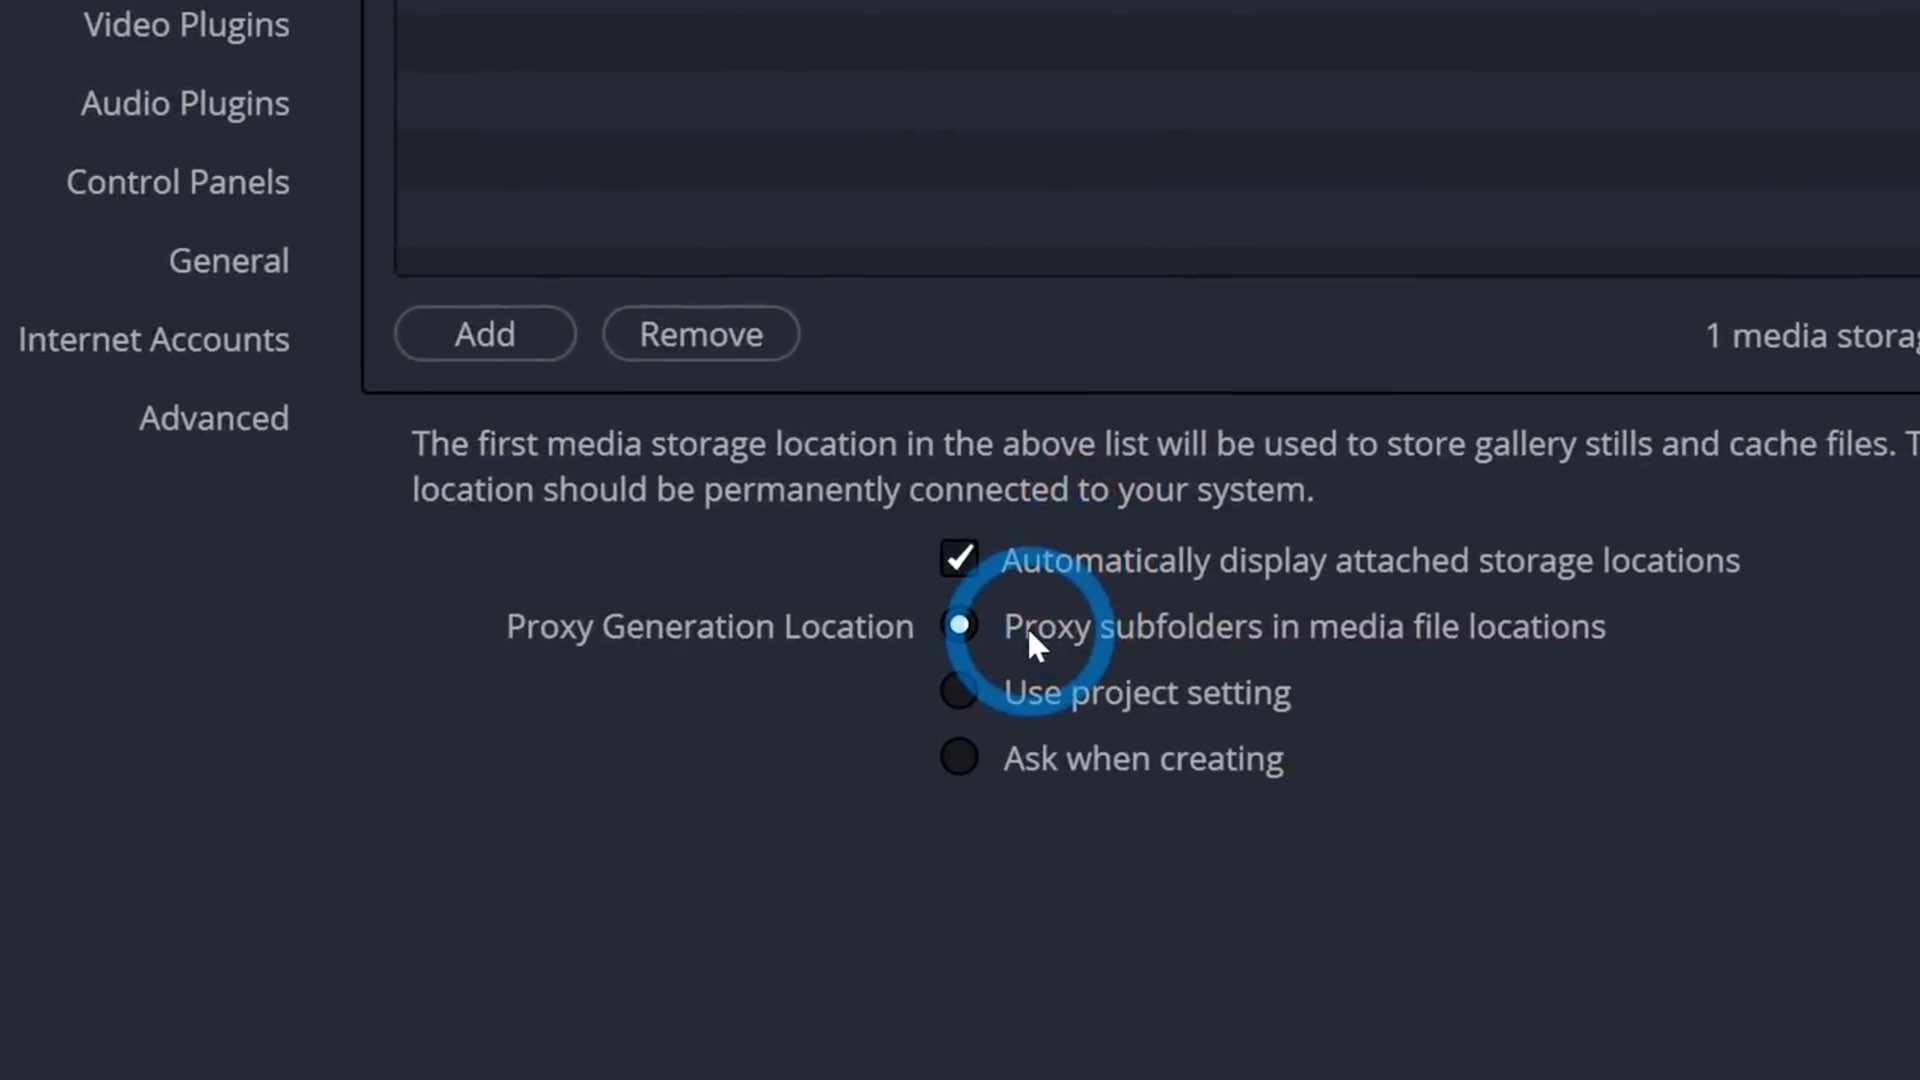
One of the most important things, when working with proxies, is to carefully pick the locations of those files. Generating proxies means that you will be generating twice more files. Hence, you would want to work precisely as you can so you can remember when those proxies are located according to the original files, in your external drive (DO NOT generate proxies in your internal disk —always generate them near your original media). When you navigate to Preferences through the upper menu (clicking on ‘DaVinci Resolve’), and then go to System- Media Storage, the Media Storage Location will be open. Then you will explore the ‘Proxy Generation Location’ options. You should choose the option Proxy subfolders in media file locations. When choosing those options, the proxies will be generated in a subfolder of the location of the original media. Therefore, all proxies will be located in the same folder as the high-resolution files.
Using the Blackmagic Proxy Generator
The Blackmagic Proxy Generator is a free app that comes with DaVinci Resolve. The app works in the background. It takes new files and automatically generates proxies, and locates them in a folder called ‘Proxy’, and in the same location as the originals. Thus, the Blackmagic Proxy Generator facilitates the process of generating and saving the proxies in the ideal location.

Deliver page
When delivering the footage on the Deliver page, DaVinci knows to deliver the edited original media (and not the proxies) for maximum resolution and quality. Of course, you can always ‘deliver’ the proxied footage. However, by default, Resolve switches back to the original media. Therefore, the process of originals-proxies-originals is a no-brainer. Watch Casey’s full tutorial below:
Product List
Here’re the products mentioned in the article, and the links to purchase them from authorized dealers.
- Blackmagic Design DaVinci Resolve 18 Studio with Speed Editor