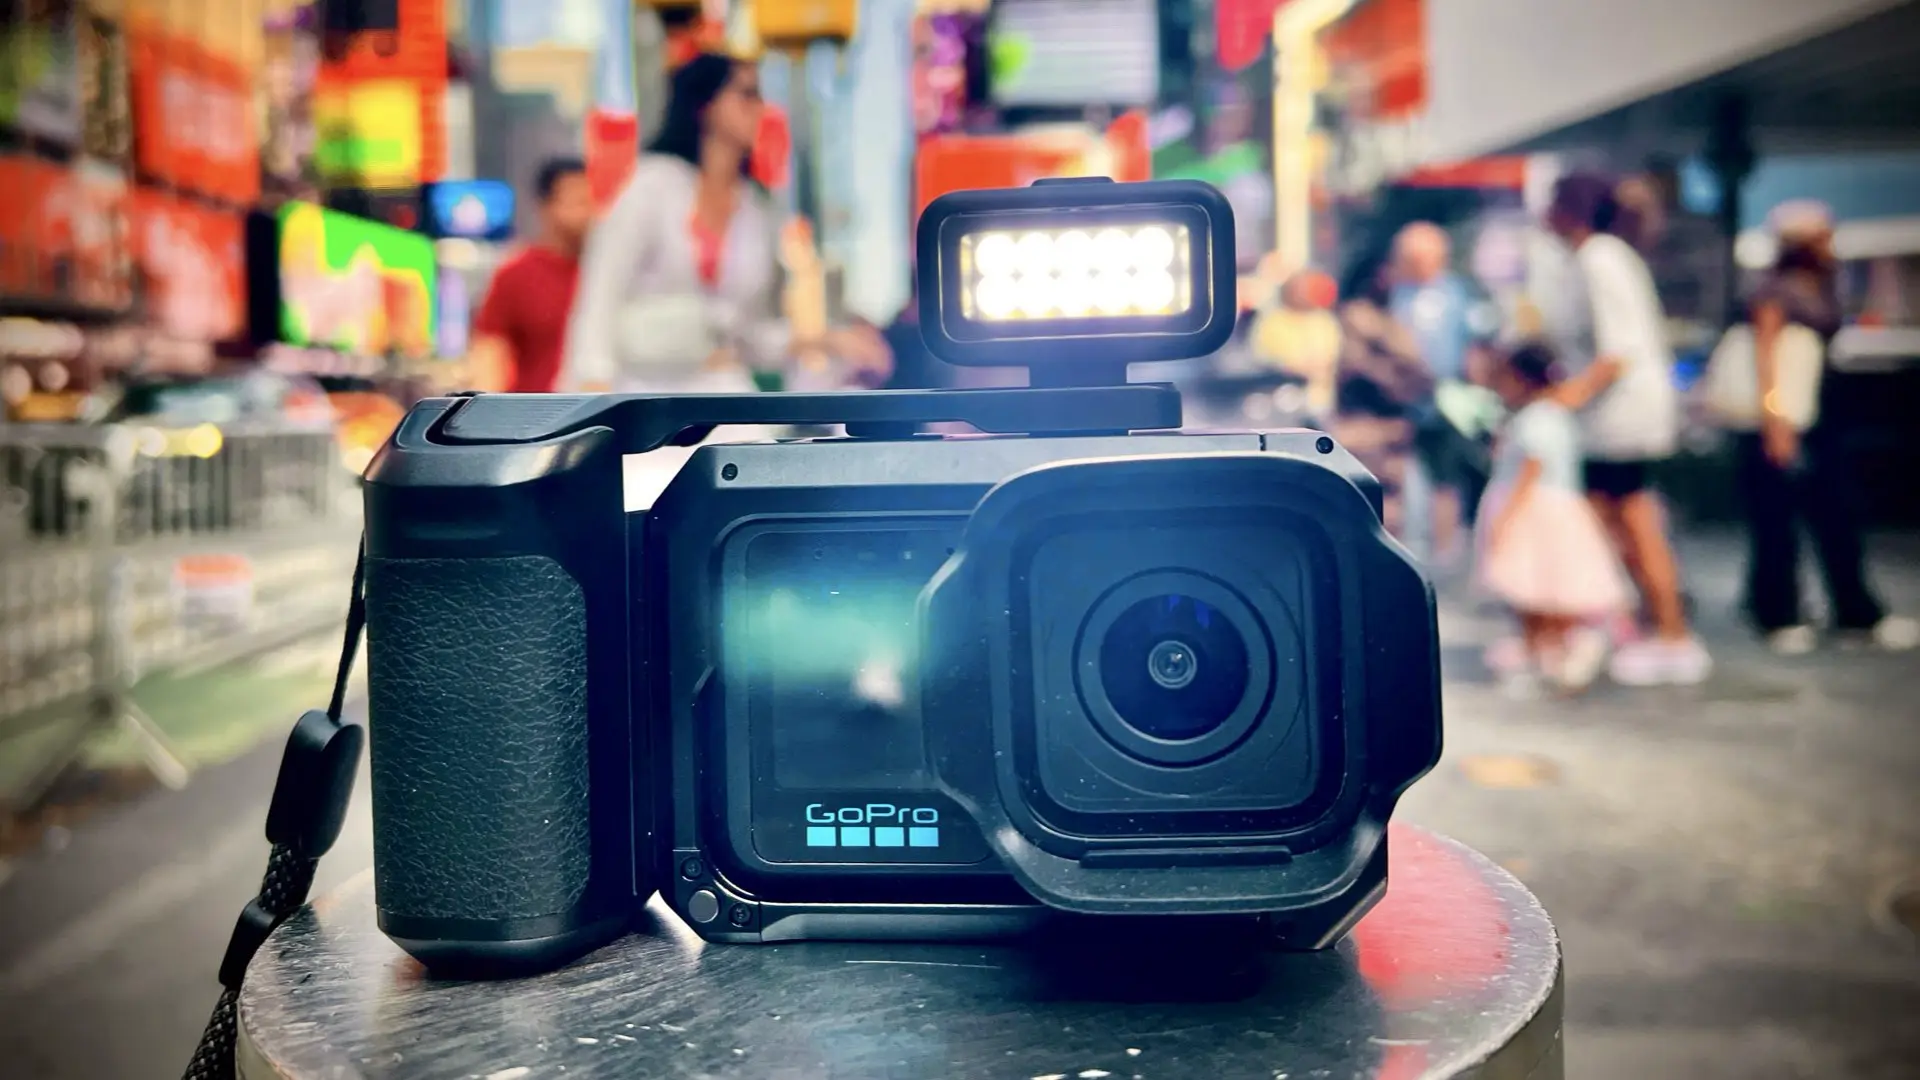
The GoPro Mission 1 Pro ($599.99 on Amazon) is built around portability, speed, and an extremely wide field of view. But after carrying it through the streets of New York and testing several shooting configurations, we found that its effectiveness as a stills camera depends heavily on how it is assembled, held, and operated. The most successful setup was surprisingly specific: the camera mounted inside its case and battery grip, held vertically, set to its maximum stills resolution, and used with the Wide field of view. The case was not merely protection. It transformed the Mission 1 Pro into a compact, stable, one-handed street camera that could be raised and operated almost instantly.
The best configuration for stills
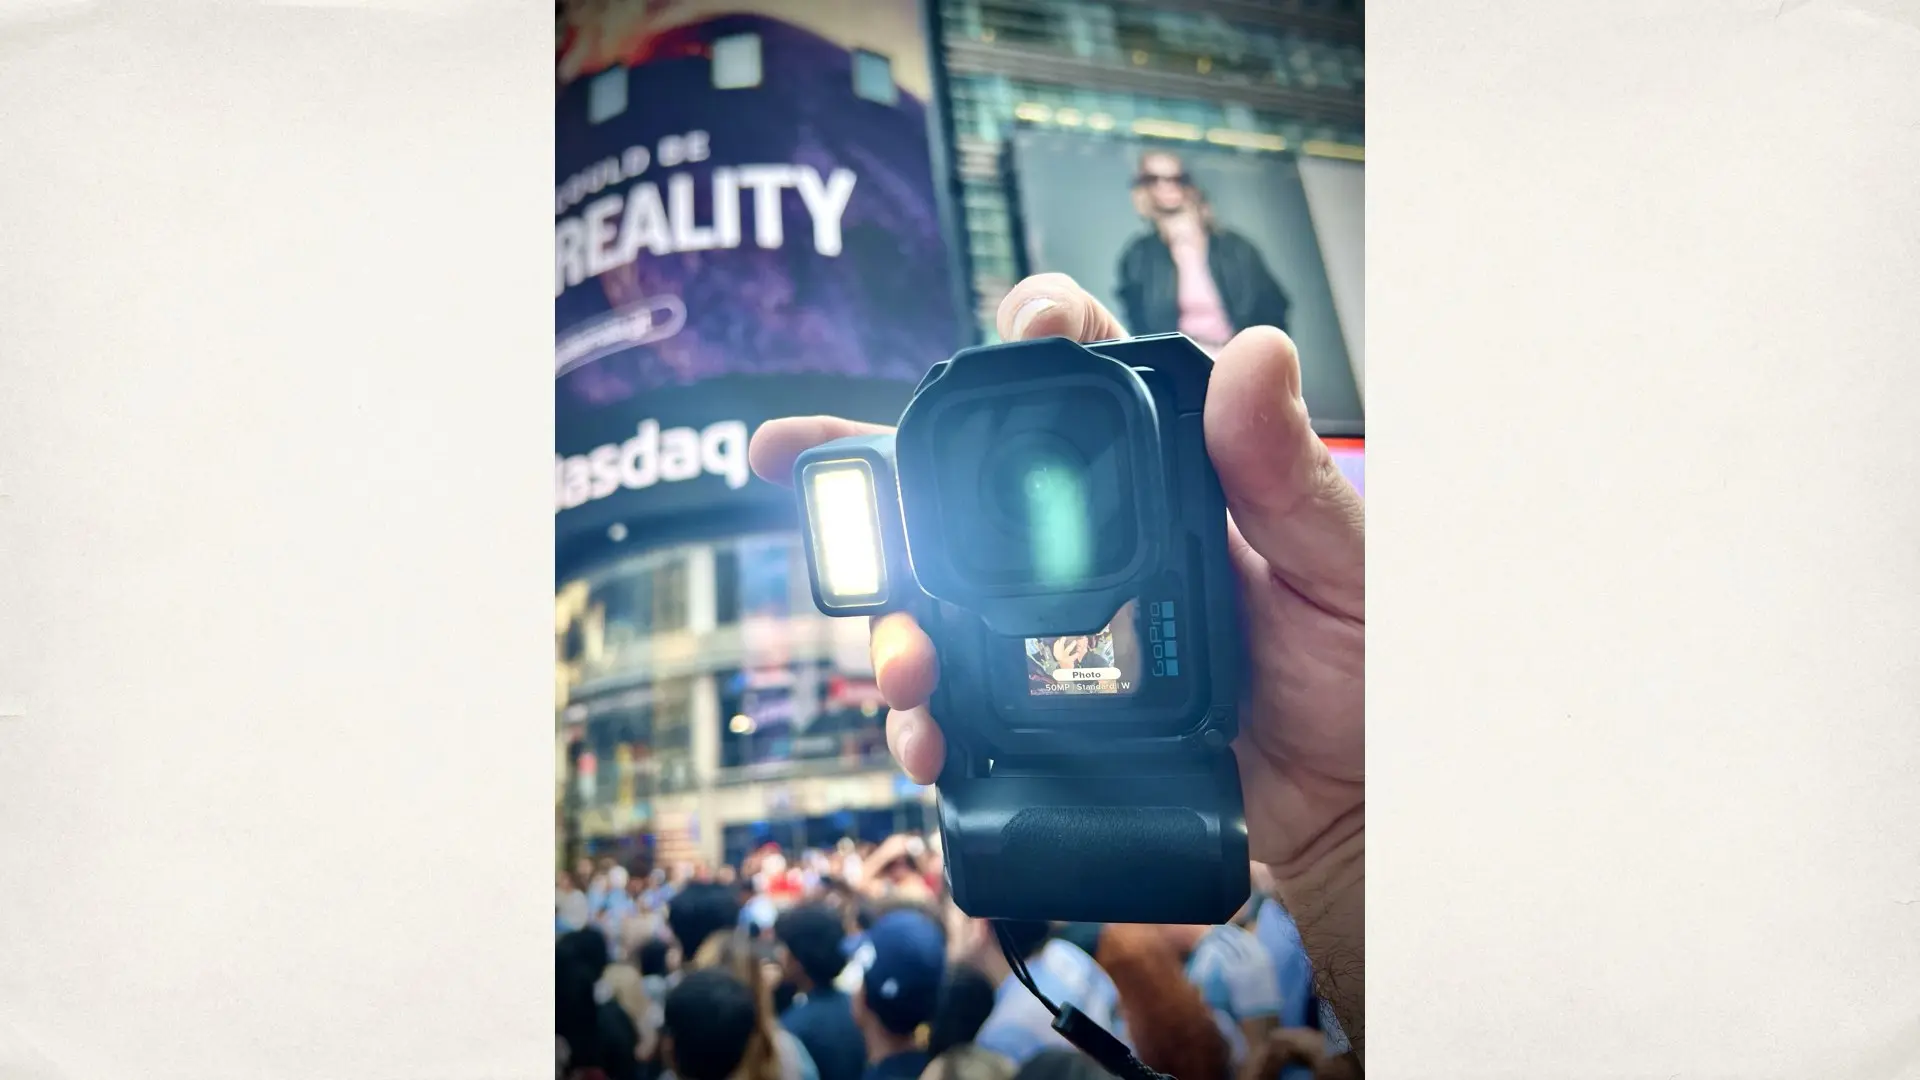
During the New York test, we experimented with different orientations and framing options. The setup that consistently delivered the strongest results was:
- Portrait orientation
- Maximum photo resolution
- Wide field of view
- Camera installed inside the case and battery grip
- Flash enabled when additional foreground illumination was needed
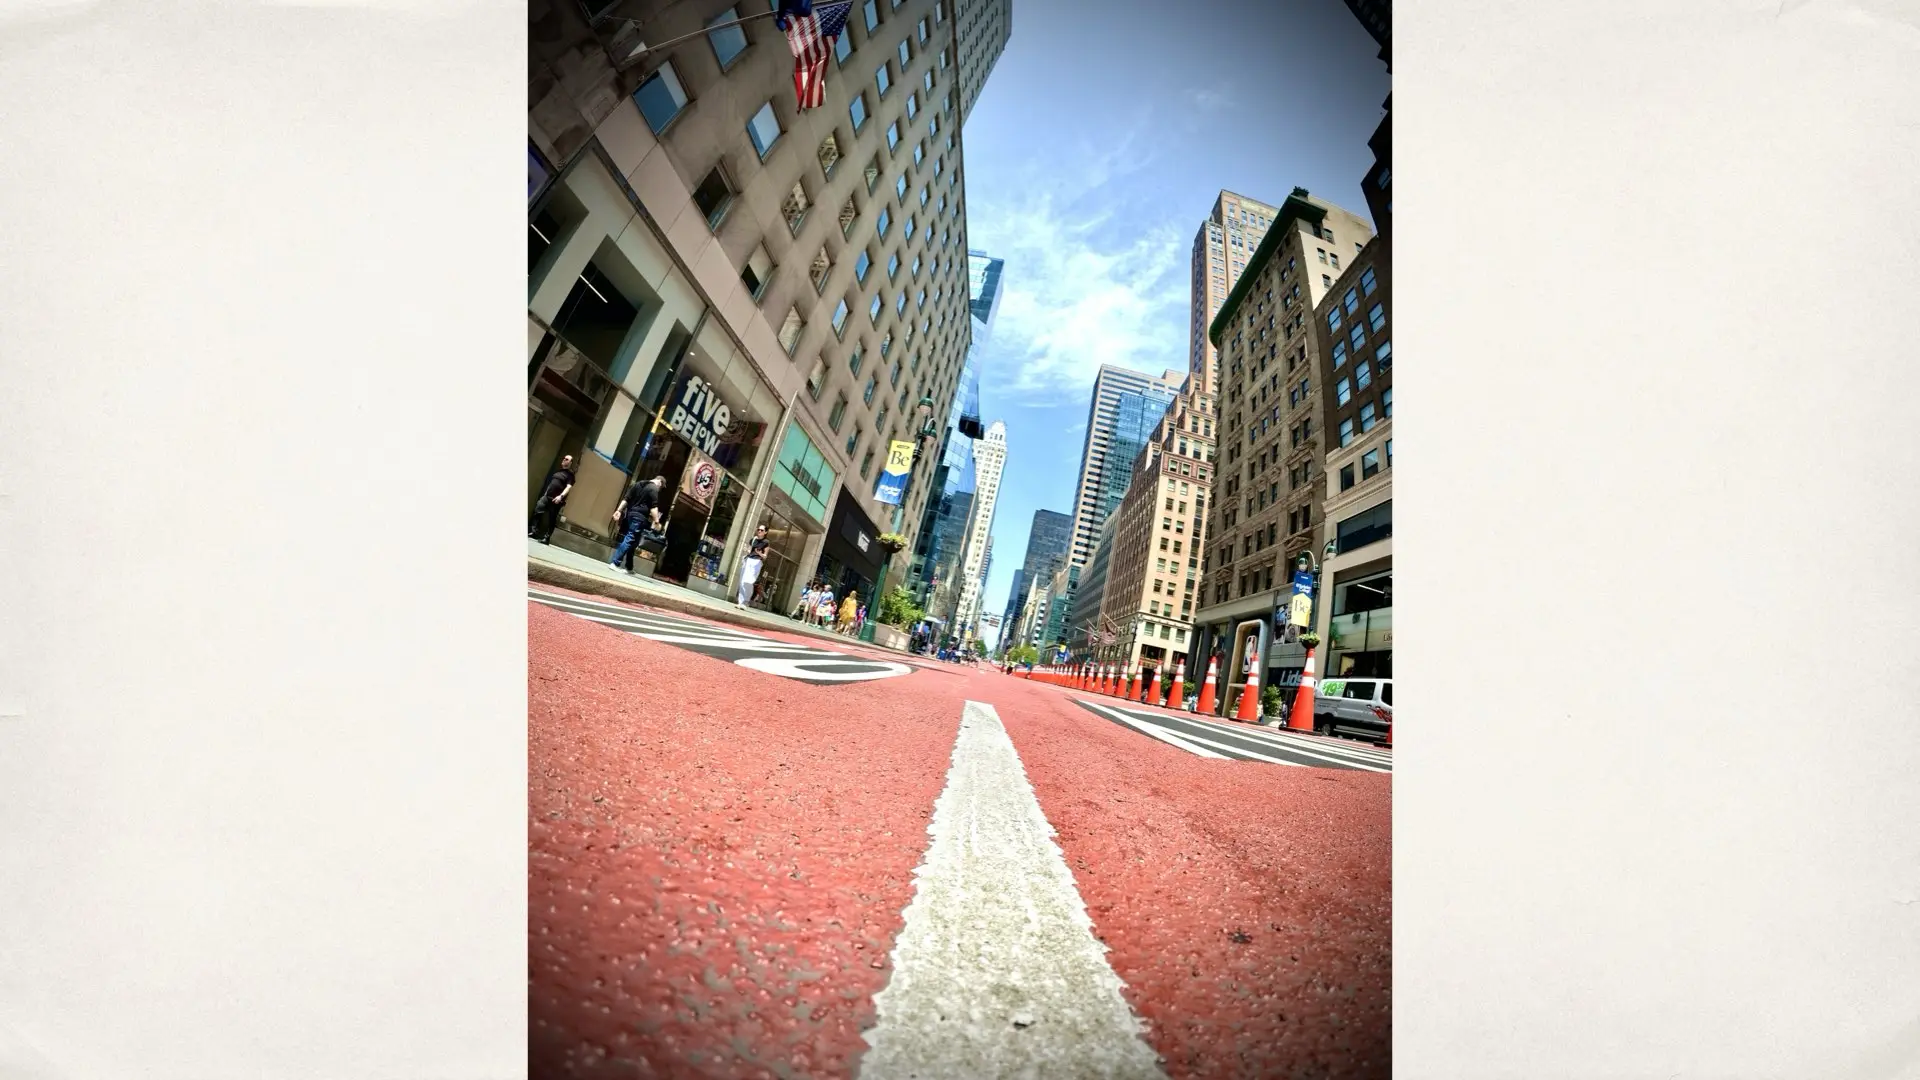
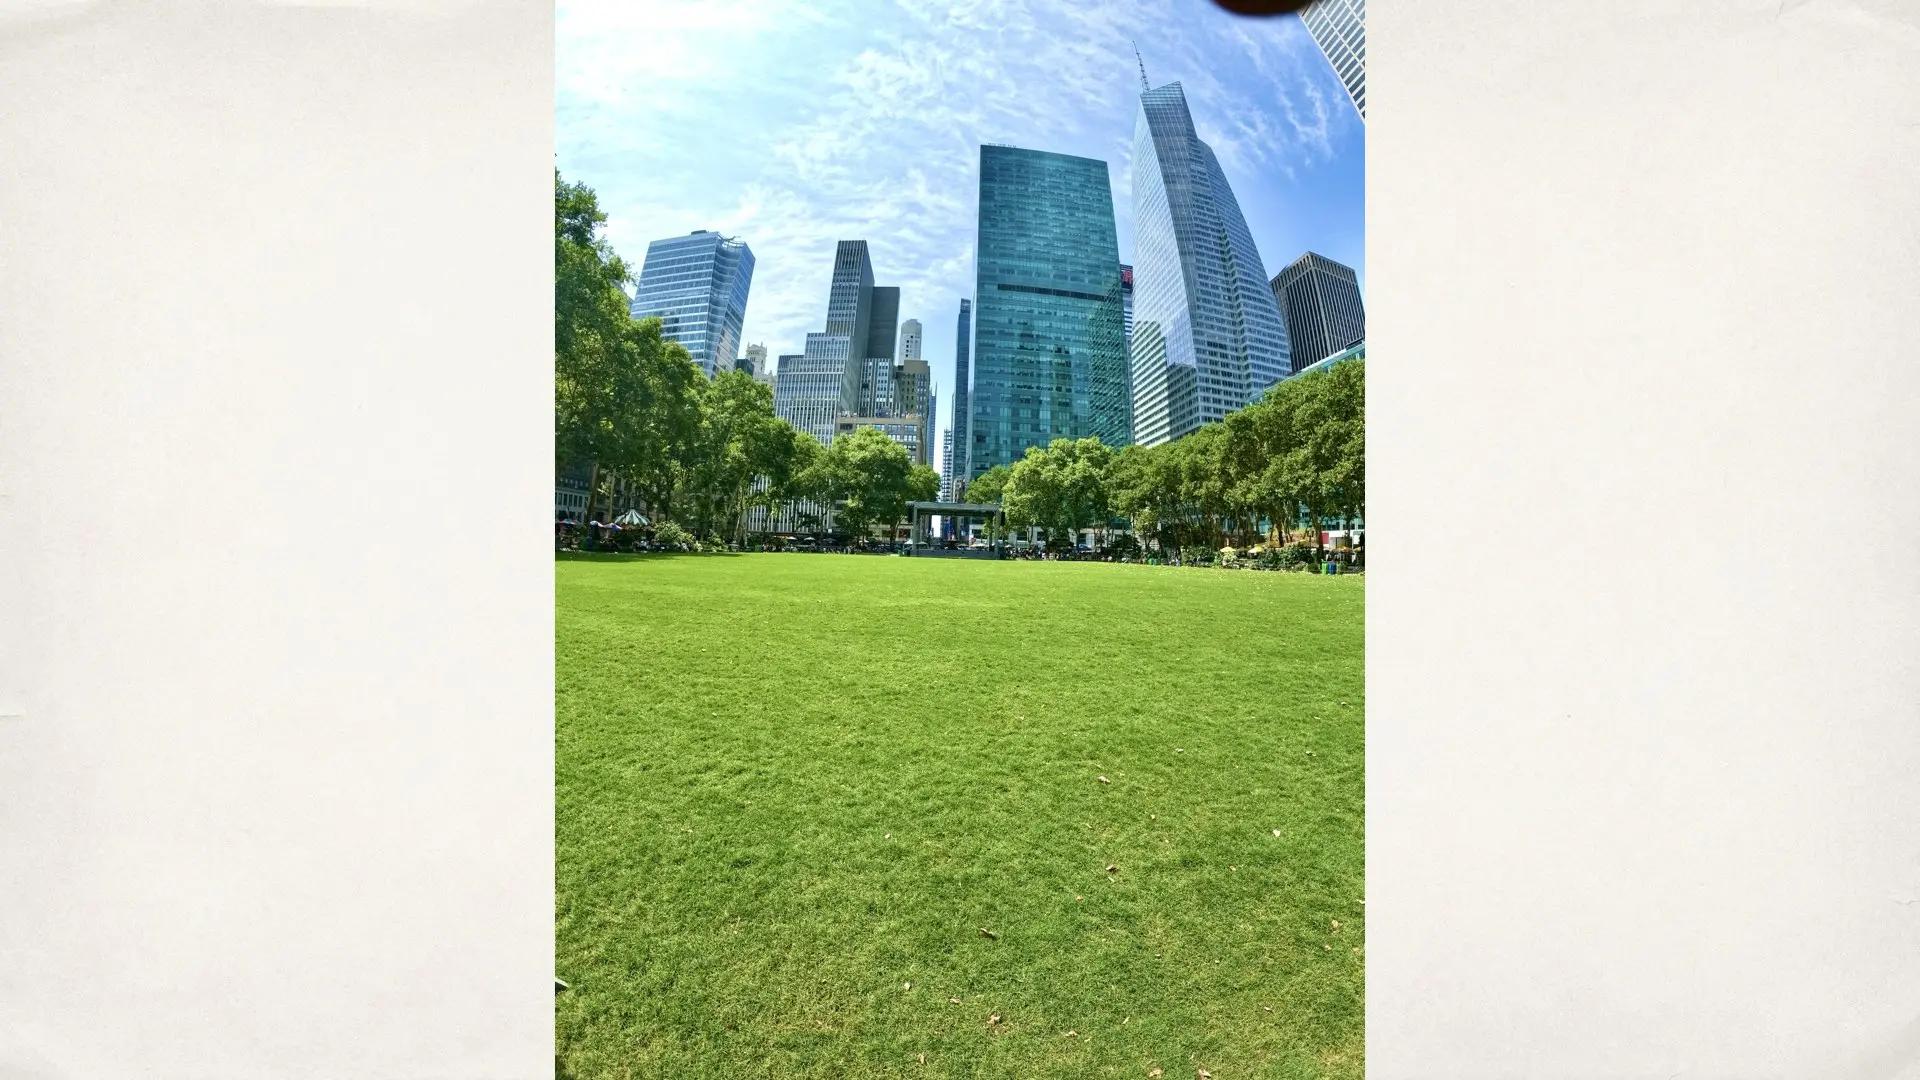
The resulting images retained the characteristic GoPro perspective: exaggerated depth, strong architectural lines, and an immersive view that separates the camera from a conventional smartphone. Rather than trying to make the Mission 1 Pro behave like a traditional compact camera, the best results came from embracing its native visual character.
📦 See the GoPro MISSION 1 Pro on Amazon
Why vertical orientation works so well
The case gives the Mission 1 Pro a taller body and a much more substantial grip. When the camera is held vertically, the body fits naturally into one hand while leaving the primary controls accessible. This is especially effective for portraits, selfies, social content, and urban photography. It also produces files that are immediately suitable for mobile platforms without requiring a severe crop from a horizontal frame. Vertical orientation does not prevent the wide lens from capturing the environment. Even in portrait mode, the Mission 1 Pro includes a large amount of surrounding architecture, street activity, sky, and background detail. That combination is one of the camera’s strongest qualities: the subject remains prominent while the location still becomes part of the image.
The grip that made the difference
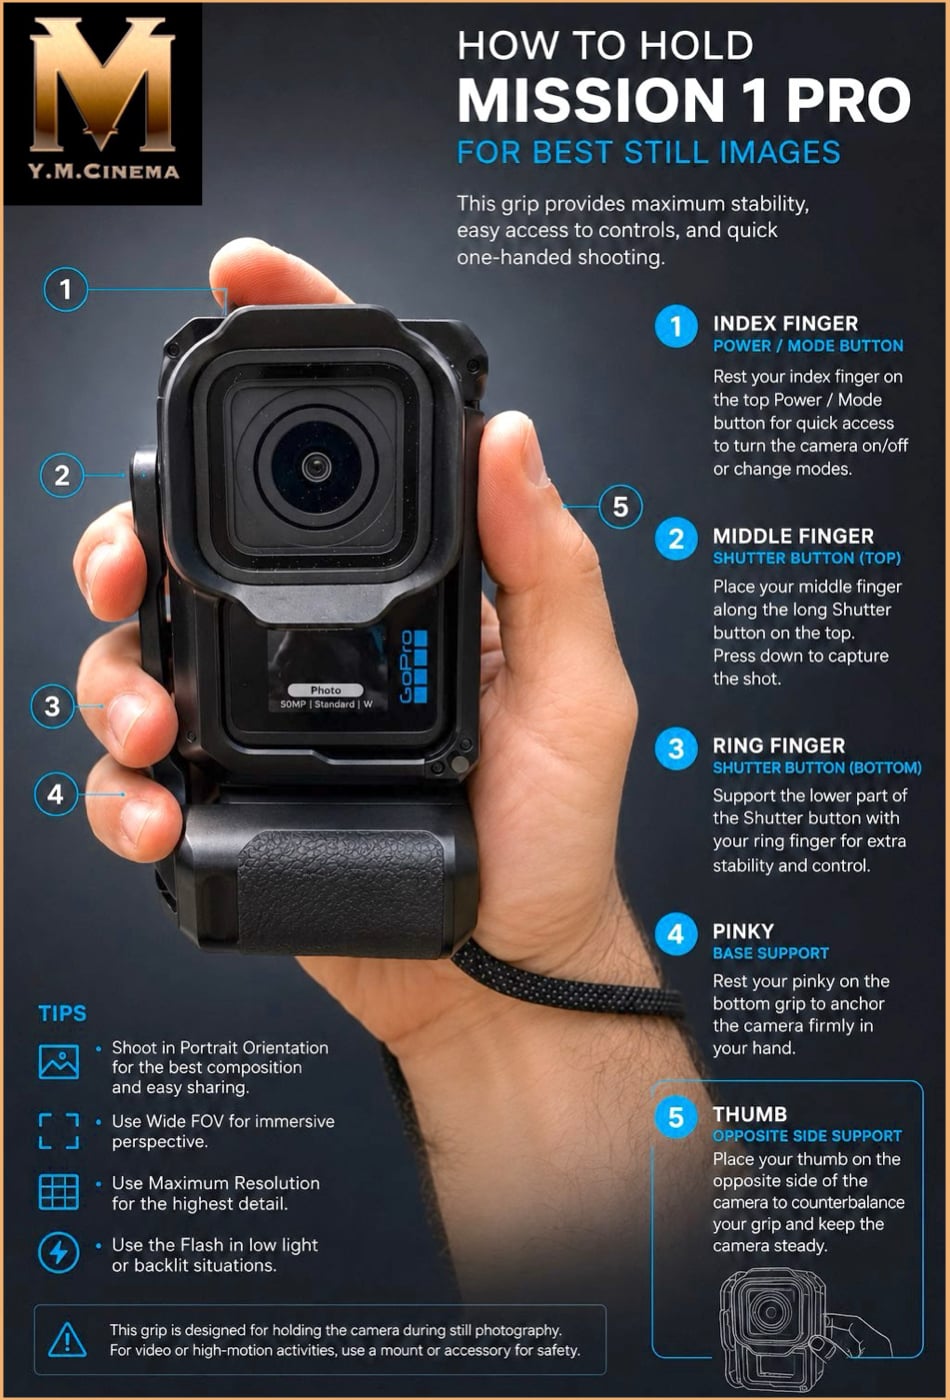
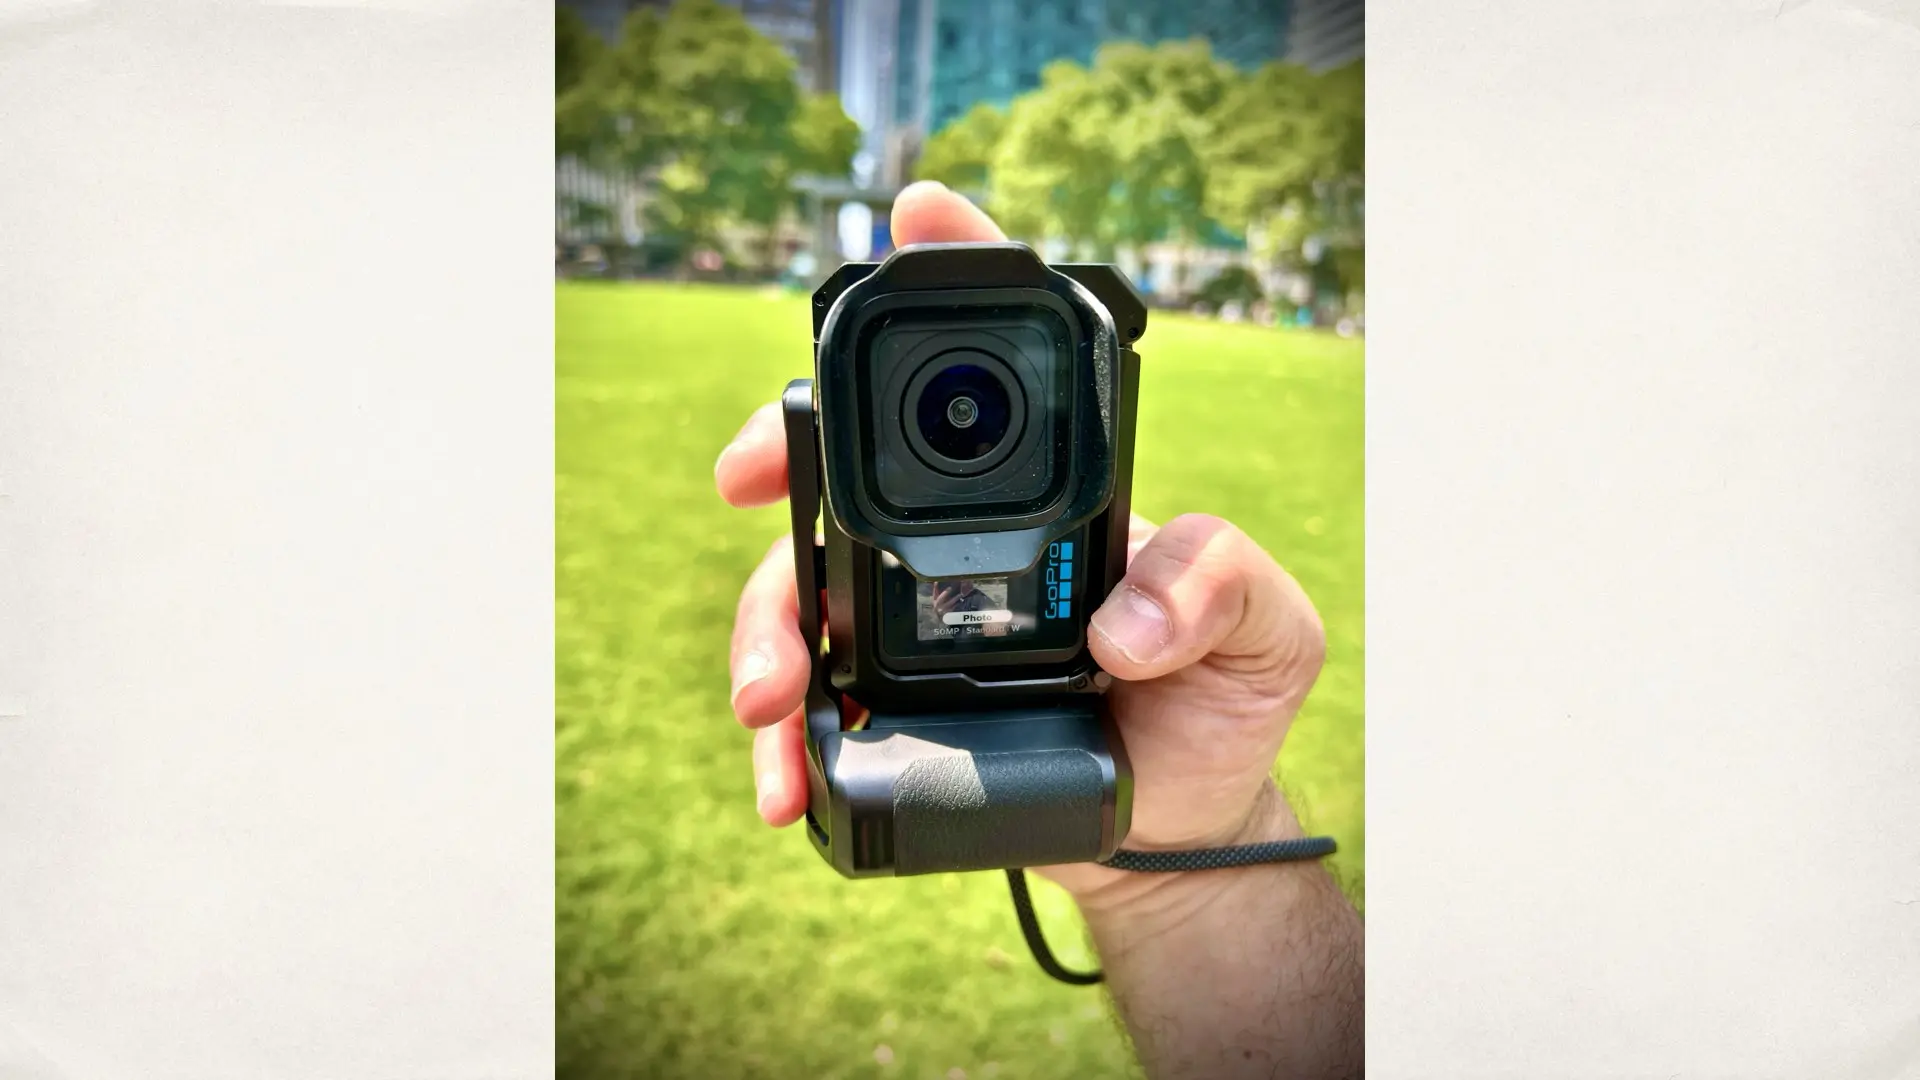
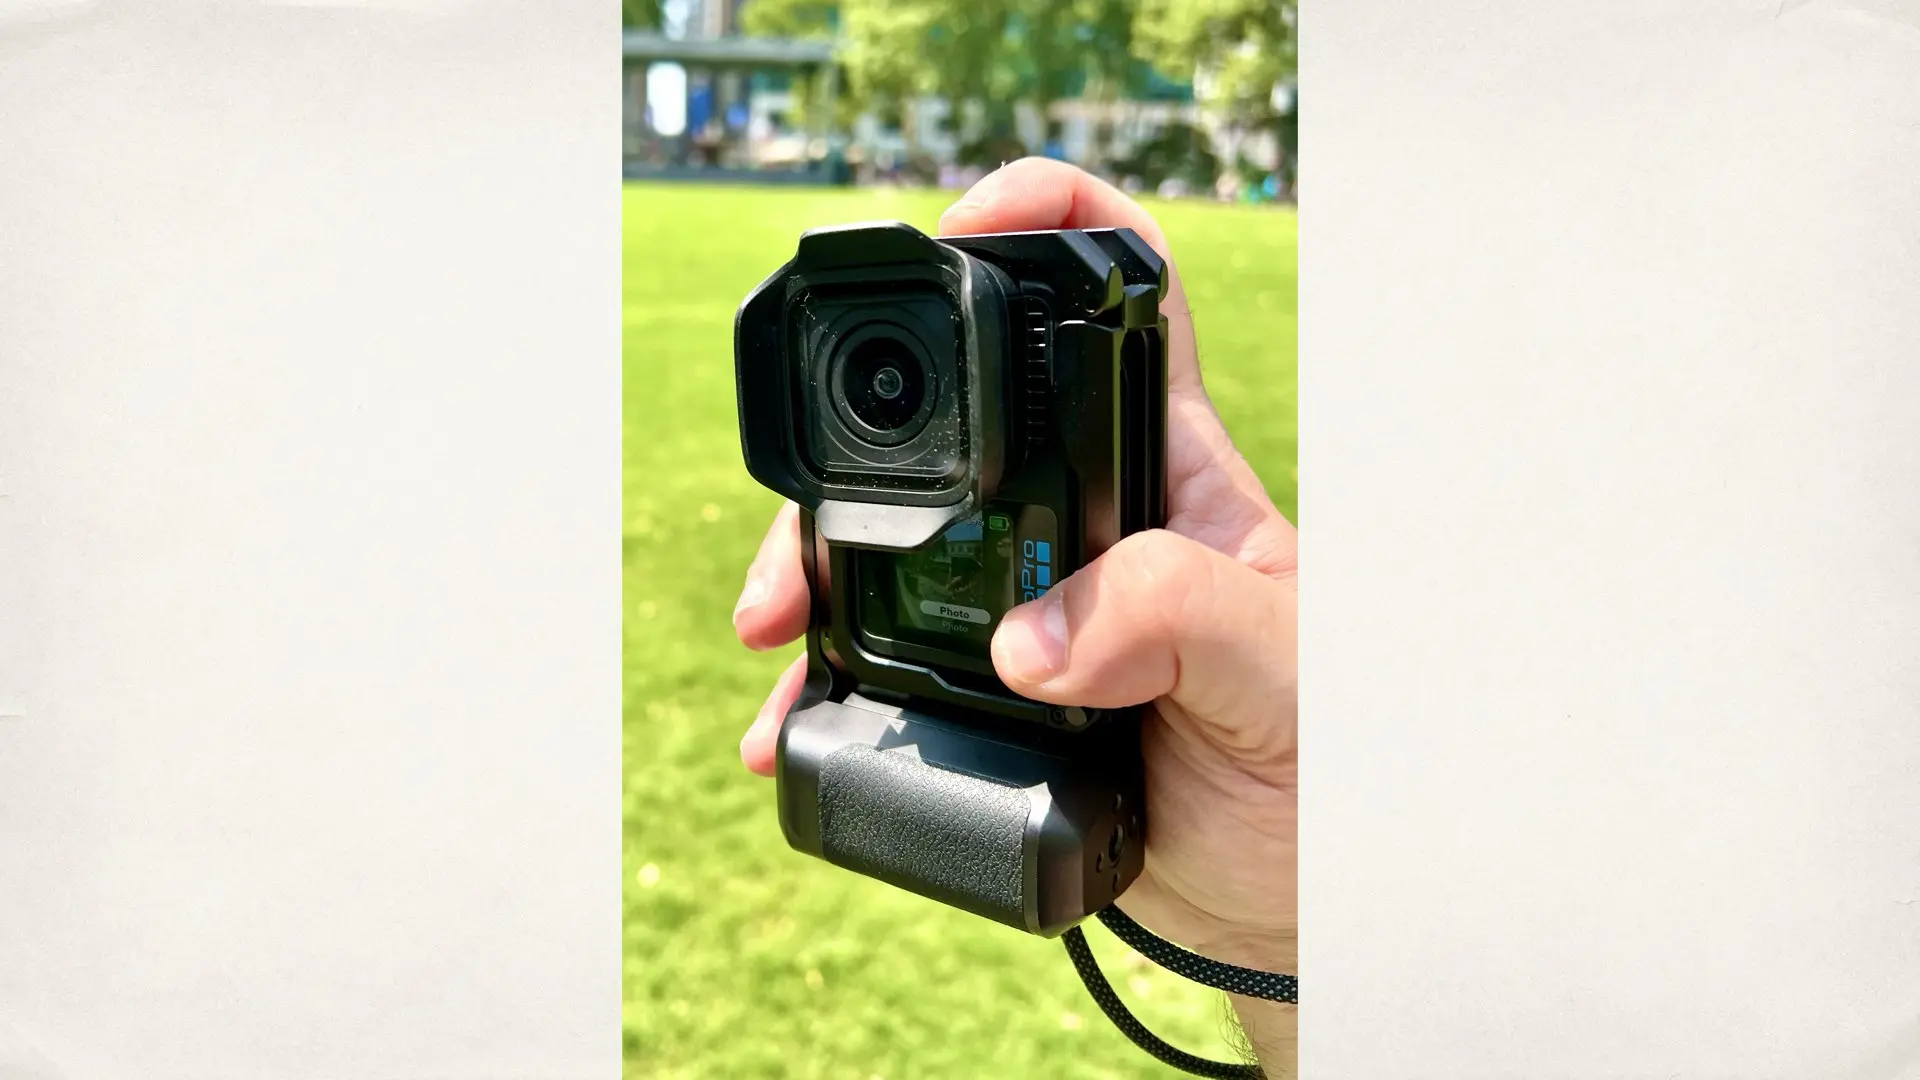
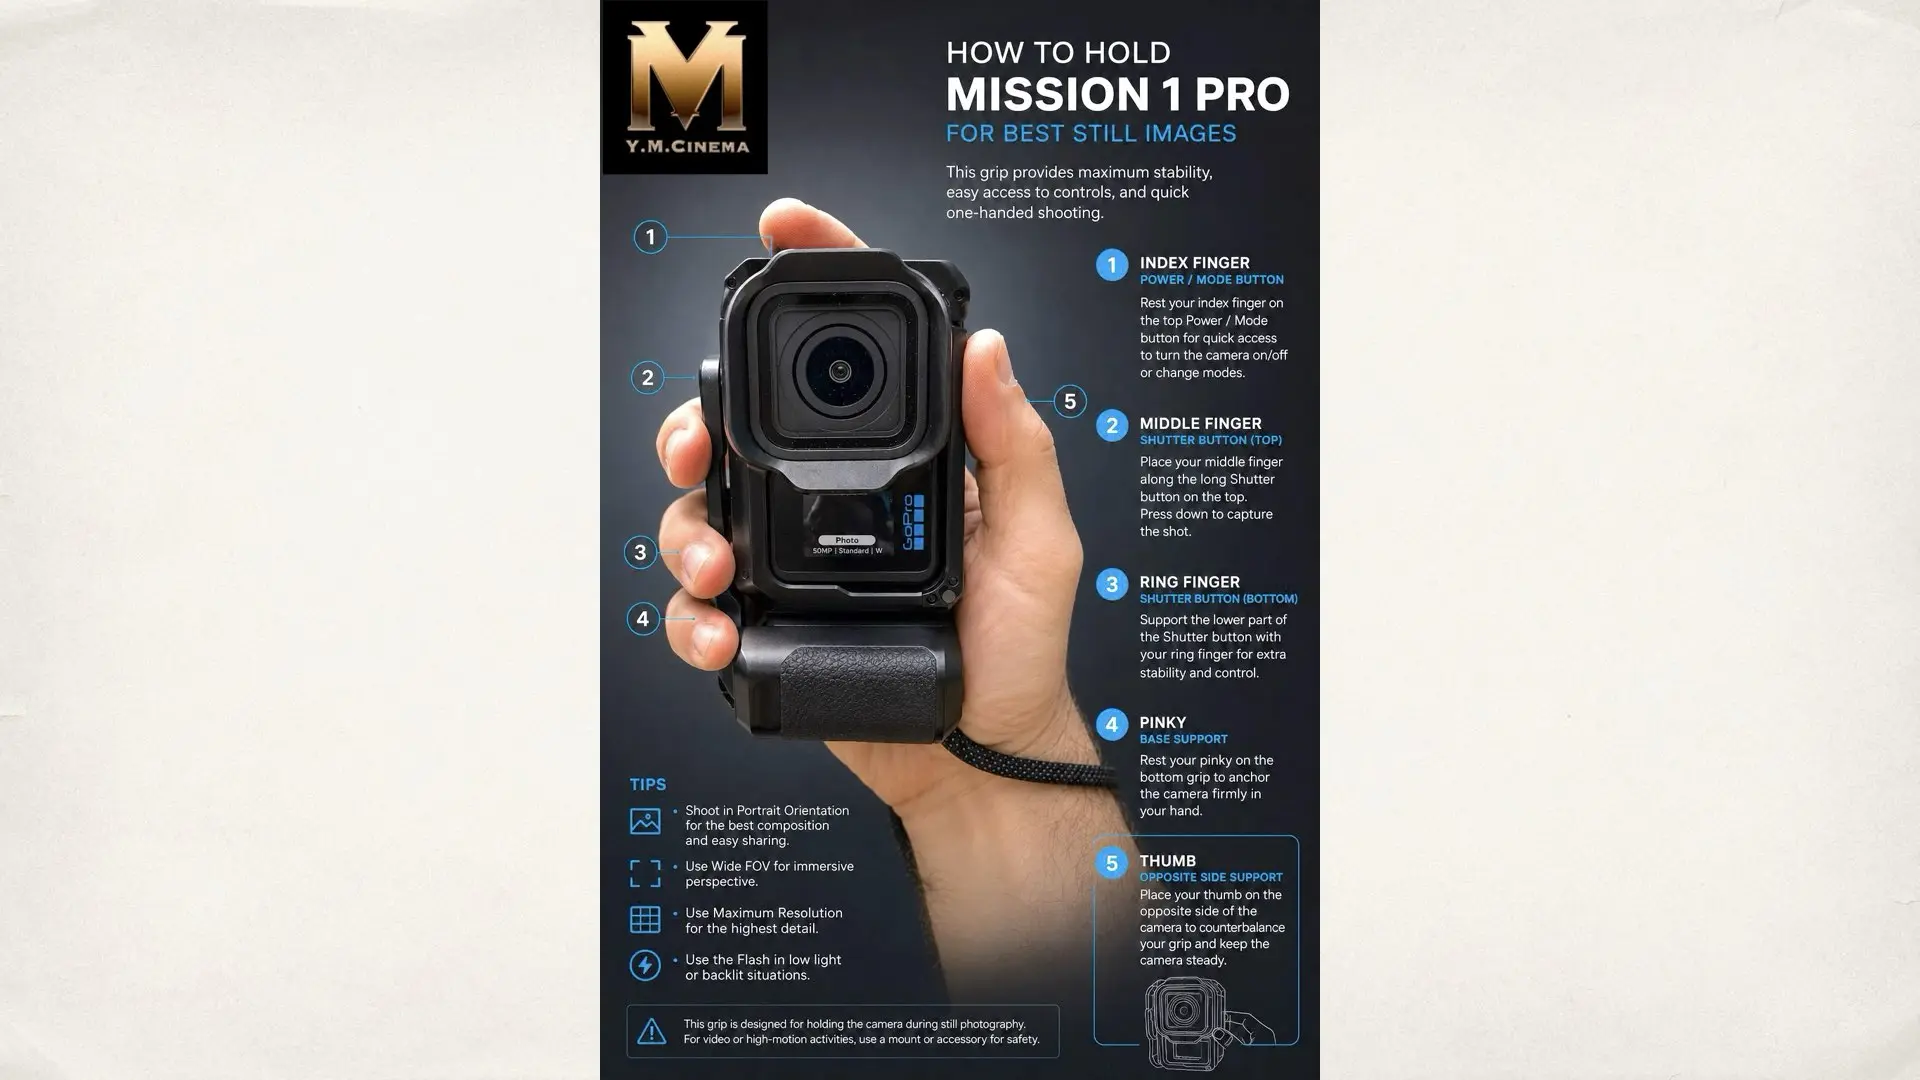
The most stable technique was to wrap the hand around the camera and its lower battery grip while assigning each finger a specific role. The index finger rests on the upper Power/Mode button, allowing the camera to be activated or its mode changed without repositioning the hand. The middle finger rests along the upper section of the elongated shutter control, providing immediate access to the shutter. The ring finger supports the lower section of the shutter control, adding both stability and another contact point for operating the camera. The pinky anchors the lower part of the case and battery grip, helping prevent the camera from rotating or slipping during one-handed use. The thumb supports the opposite side of the camera, counterbalancing the fingers and locking the system into the palm. This creates a controlled grip rather than a loose fingertip hold. The camera feels more like a compact vertical shooting device and less like a small action camera being pinched between two fingers. It also makes selfie operation considerably easier. The shutter can be triggered without shifting the camera, which reduces unwanted movement at the moment of capture.
📦 See the GoPro MISSION 1 Pro on Amazon
The case is part of the shooting system
It would be easy to treat the case as an optional accessory, but for still photography it substantially improves the usability of the Mission 1 Pro. The larger lower grip distributes the camera’s weight across the palm. It provides more leverage, reduces hand fatigue, and makes the camera easier to keep level. Without the case, the camera remains extremely compact, but the smaller body gives the fingers less surface area to hold. For quick video clips or mounted use, that may not matter. For deliberate handheld stills, however, the additional grip provides a meaningful advantage. The case therefore serves three functions: It protects the camera, improves endurance through the integrated battery system, and creates a more stable photographic form factor.
Why wide looks better than linear
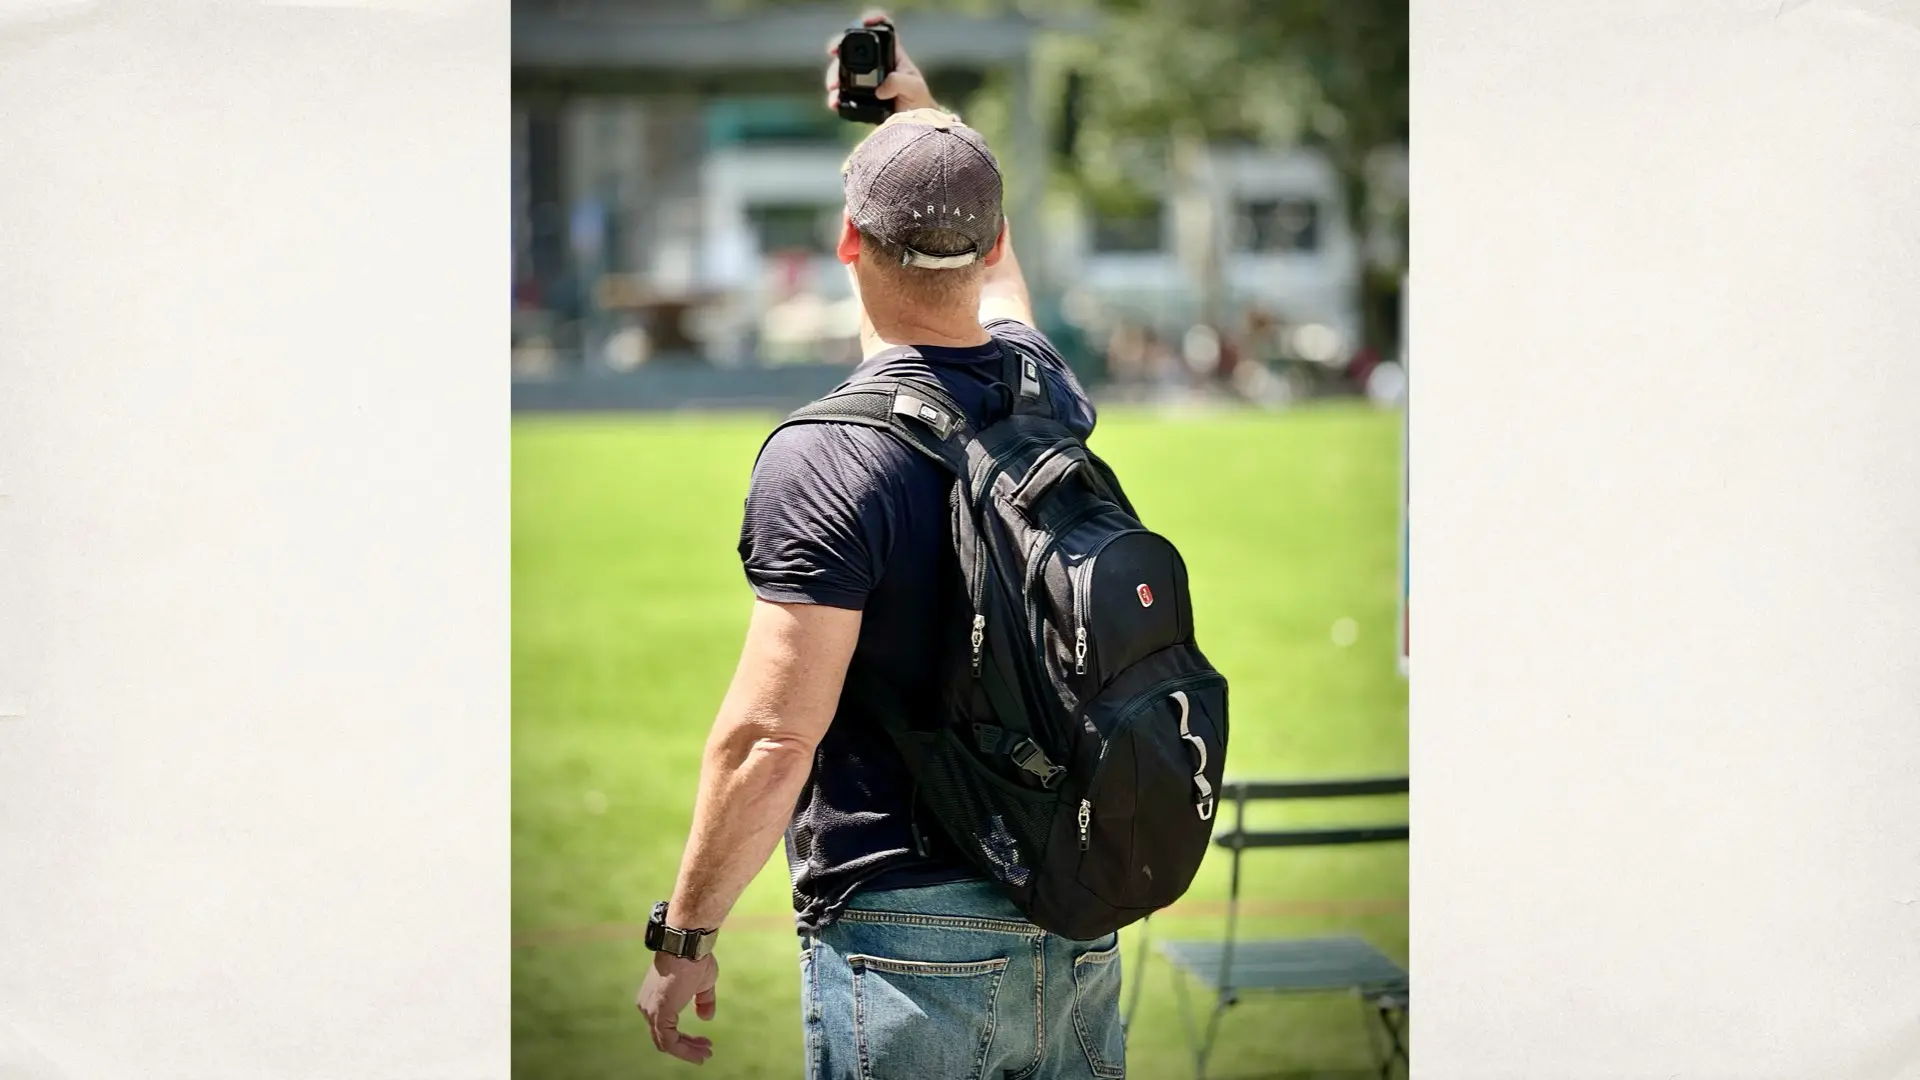
Linear mode may initially appear to be the more conventional choice because it reduces the familiar action-camera distortion. However, during the New York test, Wide produced the more distinctive and visually engaging images. The Mission 1 Pro’s wide perspective strengthens the scale of buildings, stretches the depth of streets, and makes foreground elements feel closer to the viewer. In a dense environment such as Manhattan, that perspective creates a strong sense of location. Bryant Park appears more expansive. Skyscrapers rise dramatically around the frame. Streets feel deeper and more crowded. The camera captures not only the subject but also the visual energy surrounding it. Linear mode can produce a more restrained image, but it also removes part of the reason to carry this camera instead of relying exclusively on a smartphone. Wide is not simply a technical setting. It is the visual identity of the Mission 1 Pro.
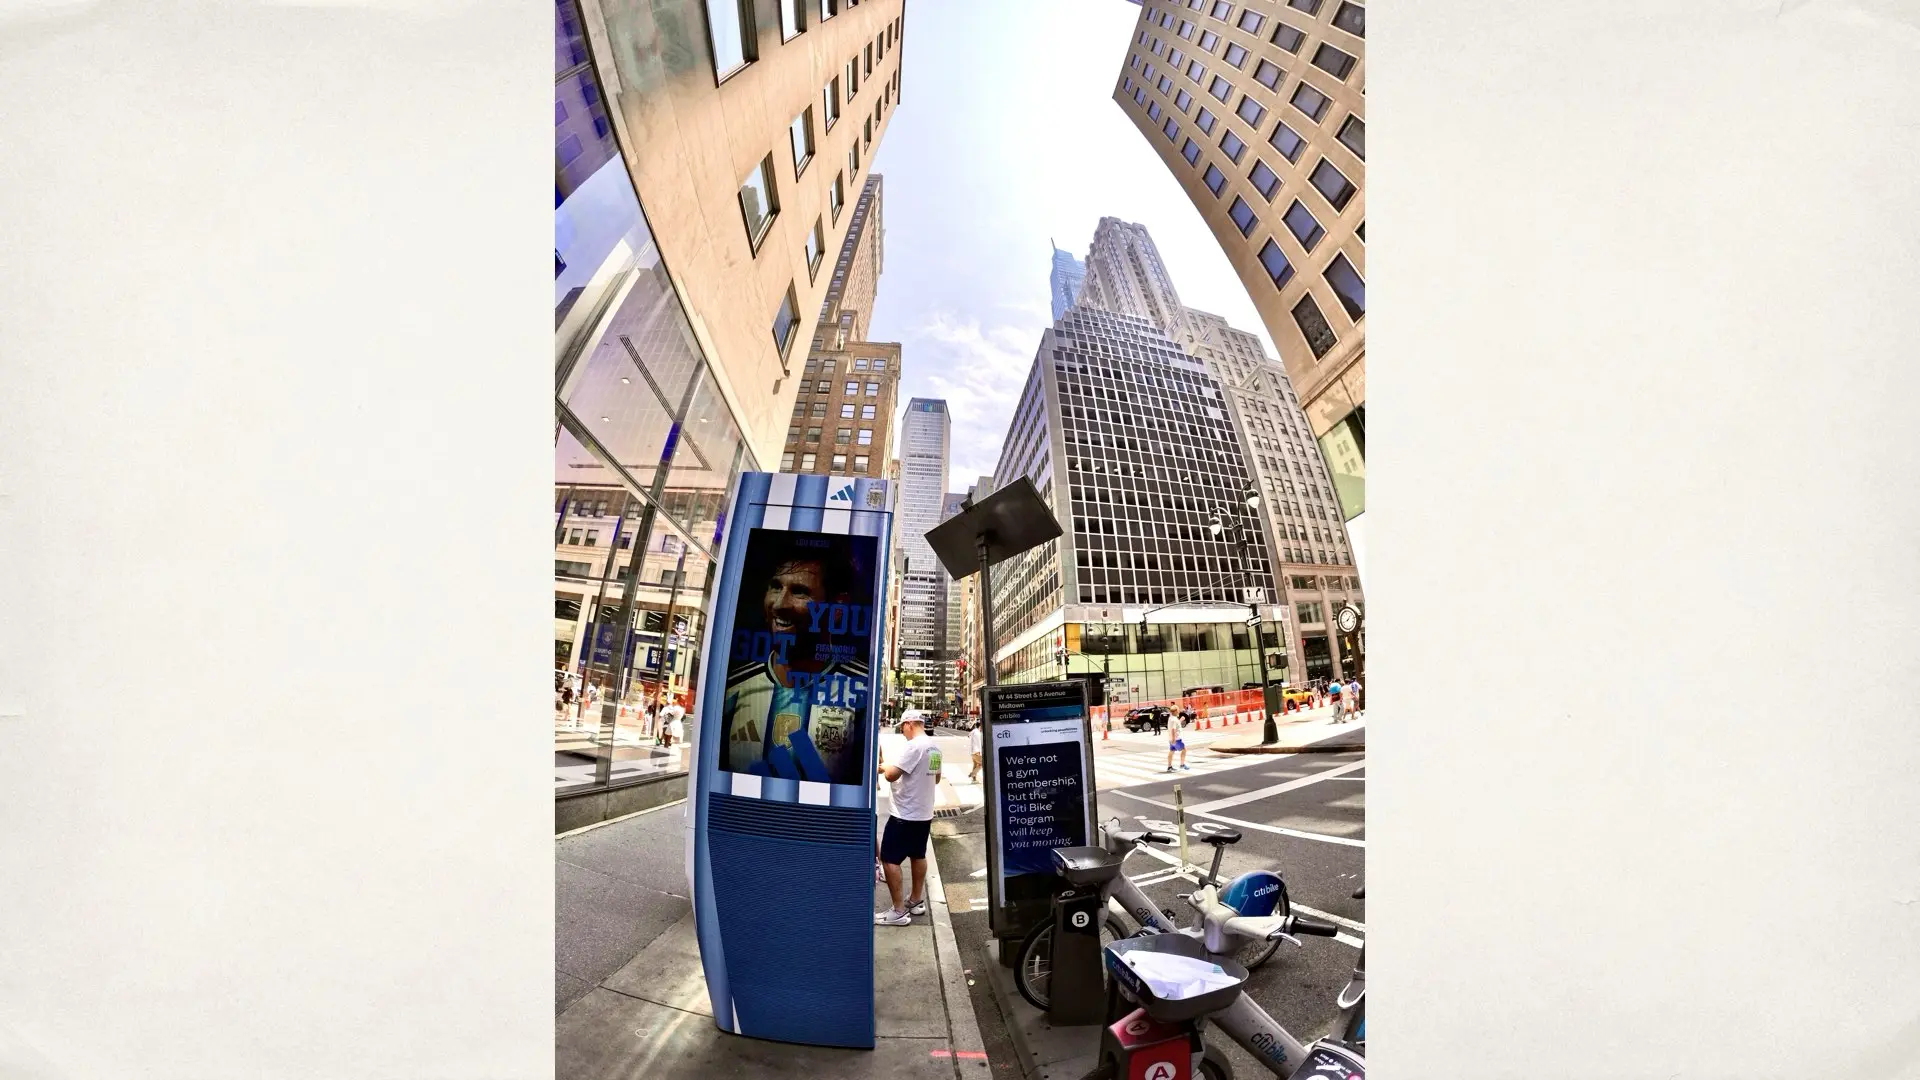
Maximum resolution provides more flexibility
When shooting stills, maximum resolution is the logical choice whenever storage and processing time are not concerns. The additional image data provides greater flexibility for reframing, straightening horizons, correcting composition, and preparing different aspect ratios for publication. This is particularly useful with a very wide lens. Wide-angle photographs often include more information than is ultimately required. A high-resolution source file makes it easier to refine the final composition without sacrificing as much detail. For editorial use, this also allows one photograph to be adapted for several formats, including a horizontal article image, a vertical social post, or a tighter crop emphasizing the camera or subject.
📦 See the GoPro MISSION 1 Pro on Amazon
The flash is more useful than expected
The flash accessory proved valuable even during daylight shooting. In bright urban environments, the background can be considerably brighter than a nearby face or object. Large digital displays, direct sunlight, reflective buildings, and shaded sidewalks create substantial contrast. The flash can function as fill light, lifting the foreground while preserving the visual impact of the background. It is especially useful for:
- Selfies against bright signs or screens
- Faces photographed in shade
- Backlit subjects
- Close-up product shots
- Street scenes with strong contrast
- Low-light environments
The flash should not necessarily be used continuously. In direct frontal situations, excessive output can produce harsh highlights or reflections. But when applied selectively, it significantly improves subject separation and exposure balance.
A strong street photography tool
The Mission 1 Pro is not a substitute for a full-size mirrorless camera, nor does it attempt to be one. Its value comes from a different combination of characteristics. It is compact enough to remain accessible, wide enough to capture an entire environment, and fast enough to operate with one hand. Once mounted in its case and held with the correct grip, it becomes a practical street-photography device rather than merely an action camera. The New York test demonstrated that the camera works best when used according to its strengths.
- Do not fight the wide lens.
- Do not hold the camera delicately.
- Do not treat the case only as protection.
Use the case as a grip, hold the camera vertically, assign each finger a specific control point, shoot at maximum resolution, and enable the flash when the foreground needs support.
Final thoughts
The best stills workflow for the GoPro Mission 1 Pro is not based on a single menu setting. It is the result of the complete physical setup. The case and battery grip improve stability. Vertical orientation creates a natural one-handed shooting position. The Wide field of view preserves the camera’s distinctive perspective. Maximum resolution provides room for post-production, while the flash helps control difficult lighting. Most importantly, the specific finger placement makes the camera faster and more secure to operate. After shooting with the Mission 1 Pro throughout New York, this became the most effective configuration: Case installed. Camera vertical. Maximum resolution. Wide field of view. Index finger on Power/Mode. Middle and ring fingers positioned along the shutter control. Pinky anchoring the lower grip. Thumb supporting the opposite side. It may not be the official technique described in a GoPro manual, but in real-world use, it delivered the best combination of stability, speed, and image quality. The accompanying grip illustration is an independent YMCinema field guide based on hands-on testing. It is not an official GoPro instruction manual. Download it here.
As an Amazon Associate, Y.M.Cinema earns from qualifying purchases. If you purchase through the Amazon links above, Y.M.Cinema may earn a small commission at no additional cost to you. This helps support our work.
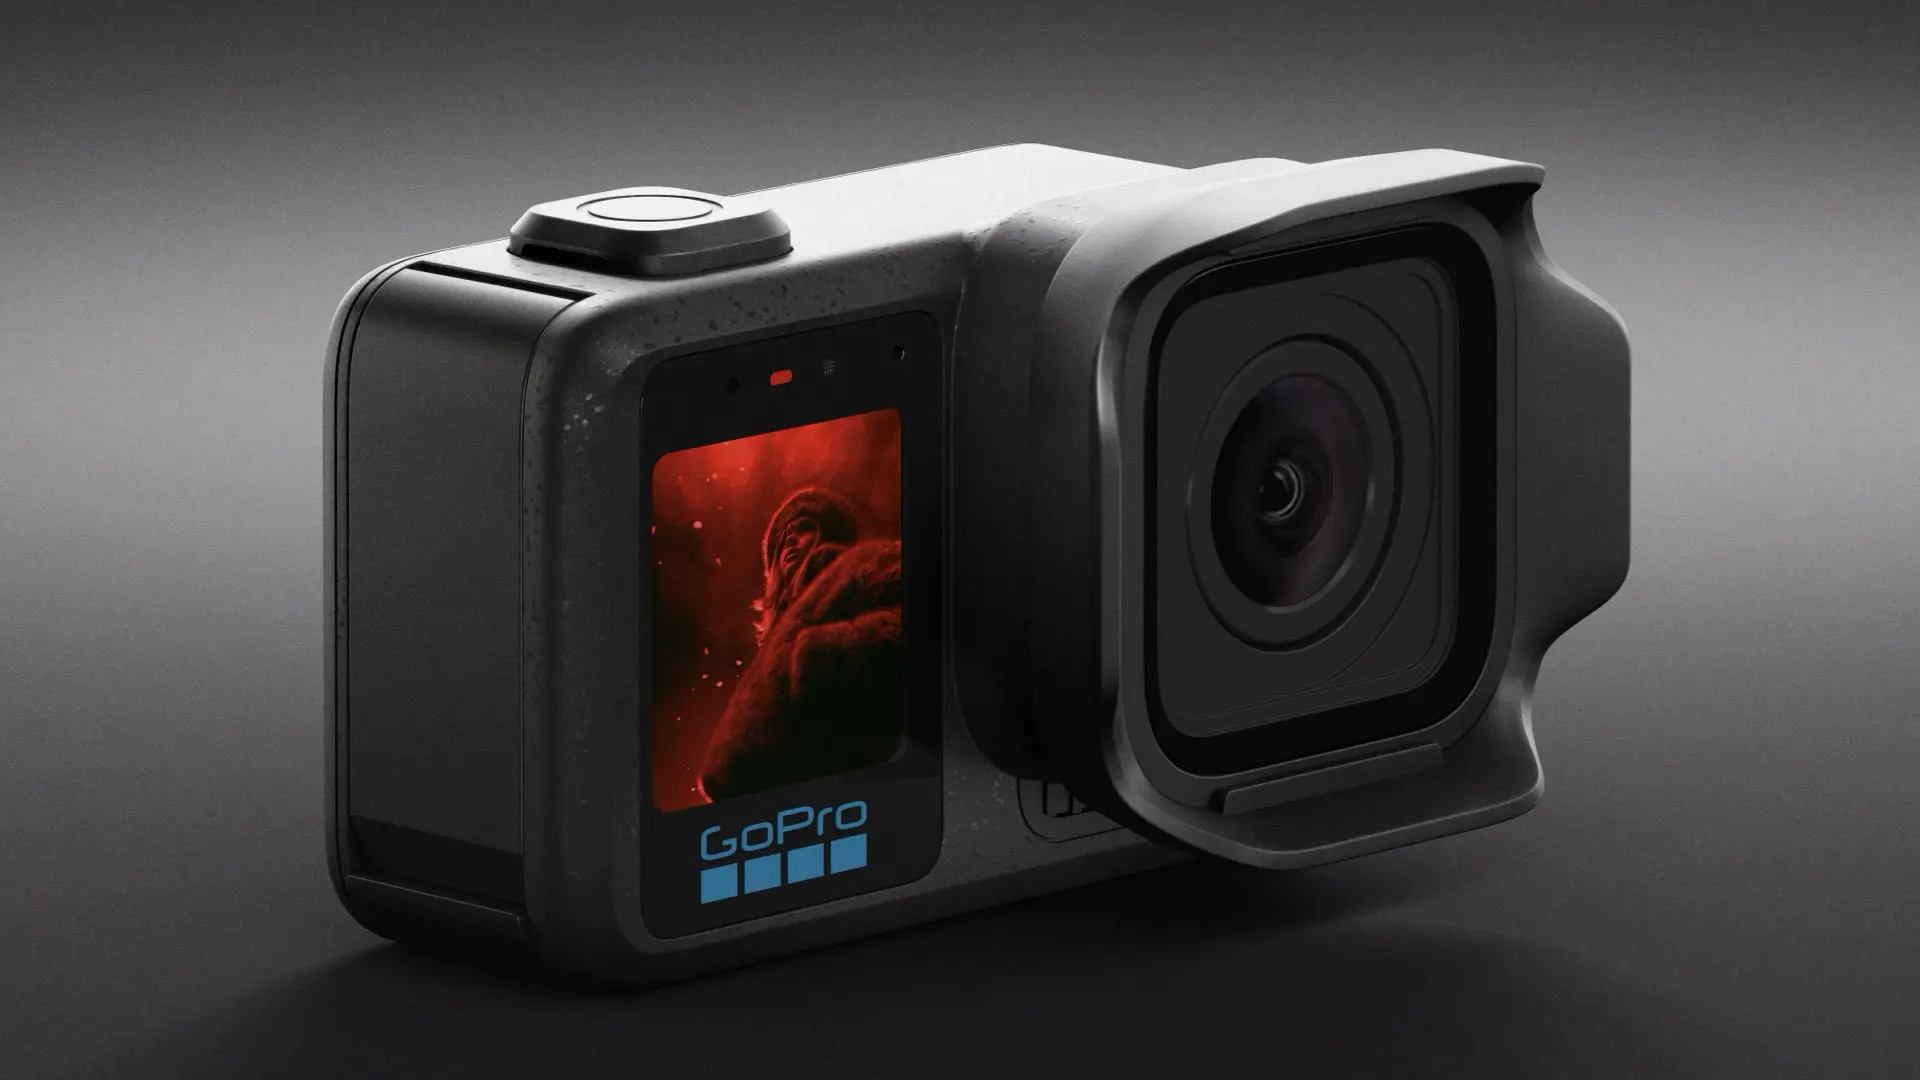
Gear mentioned in this article
Available on Amazon
| Product | New | Renewed | Used |
|---|---|---|---|
| GoPro MISSION 1 PRO ILS | $599.99 | — | — |
Prices checked: Oct 7, 2026, 1:31 PM GMT+0000
As an Amazon Associate, Y.M.Cinema earns from qualifying purchases. If you buy through our links, we may earn a small commission at no extra cost to you.
Product prices and availability are accurate as of the date/time indicated and are subject to change. Any price and availability information displayed on Amazon.com at the time of purchase will apply to the purchase of this product.
CERTAIN CONTENT THAT APPEARS ON THIS SITE COMES FROM AMAZON. THIS CONTENT IS PROVIDED “AS IS” AND IS SUBJECT TO CHANGE OR REMOVAL AT ANY TIME.